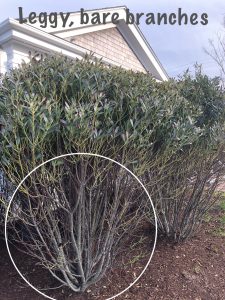
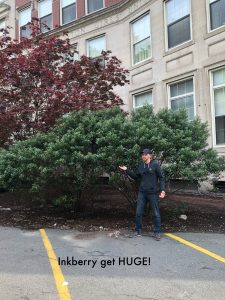
Inkberry, Ilex glabra, is a beautiful, rounded, evergreen shrub that grow 5 – 8′ tall. It prefers full sun and evenly moist acidic soil, but does well in wet areas and light shade. When properly pruned, inkberry can make a nice foundation plant or short hedge, but is best used in native screens and rain gardens, where it can be left to grow naturally with little intervention needed from the gardener. Young plants are perfectly round, with leaves right to the ground. As plants mature, however, the canopy tends to shade out the bottom portion of the plant and their lower branches can become bare and leggy. Regular pruning is required to keep inkberry looking its’ best.
Most applications for inkberry call for a plant that is maintained at 3-4 feet. Once they reach this size, they need to be pruned at least once a year to keep in bounds. Shearing with hedge trimmers (when new growth has just hardened off in early summer) is the easiest way to prune rounded shrubs. Although this approach takes the least amount of time, repeated cycles of shearing can make the surface of the plant very dense, shading out the lower branches. I recommend doing a more thorough pruning procedure every other year to open up the plant. More light penetration stimulates new growth at the base and keeps the plant healthier overall. Should plants become overgrown and overly leggy, a renovation can be done during the dormant period in winter or early spring. I’ve actually cut overgrown inkberry to the ground while dormant and had excellent results.
There are several objectives when doing regular pruning on inkberry:
- To remove dead or damaged branches
- To maintain the proper height and shape
- To keep the plant green from the ground up, (not leggy)
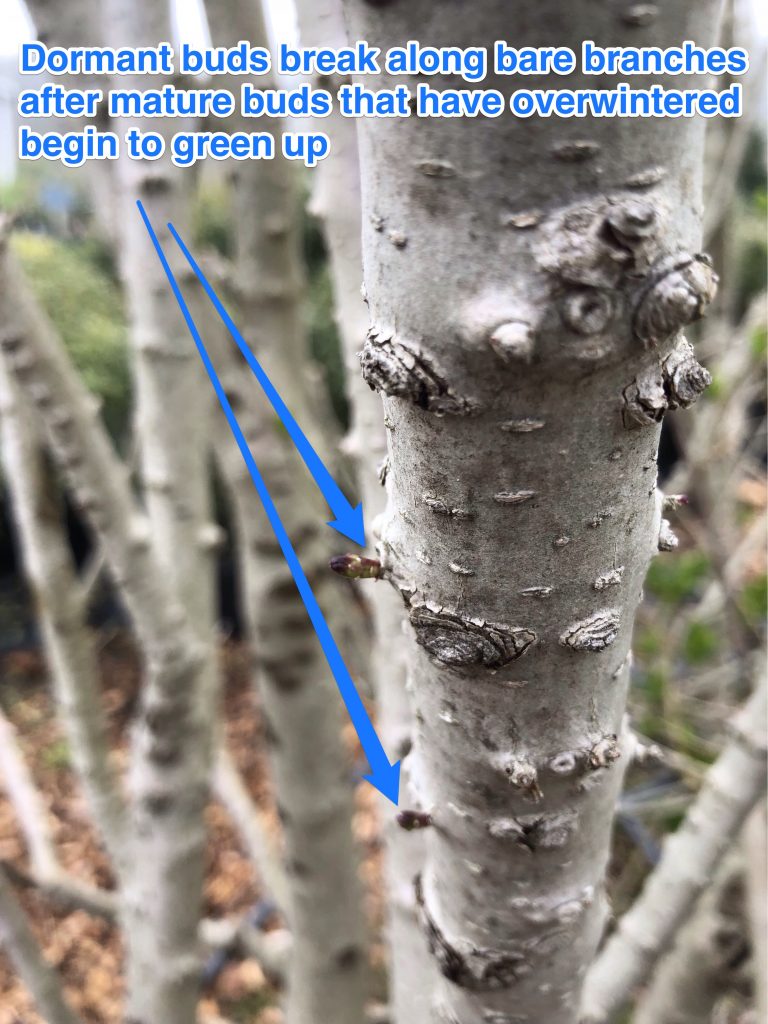
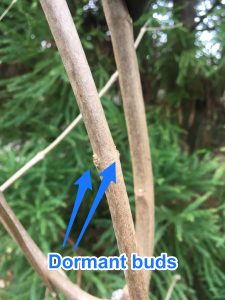
Understanding the growth pattern of these plants helps the gardener when making pruning decisions. Growth in the upper portion of inkberry plants occurs in whorls. A whorl is a ring of new stems that grow around a central, upright stem. There are many dormant buds between whorls on bare portions of the stems, even on the oldest woody stems.
 On off years, when plants are not sheared, follow these guidelines:
- Remove any dead or dying branches completely, where they meet healthy growth.
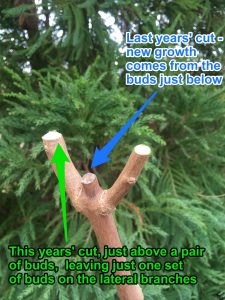
- Pinch out most of the previous seasons’ growth just above a whorl to thin out the surface and keep the plant at the best height.
- Most cuts are made in the previous season’s growth, but several cuts can also be made into older wood, to stimulate growth lower down.
- As plants age, some of the oldest branches can be removed entirely at ground level in favor of younger, more vigorous growth.
There are several varieties of Inkberry available in the trade. The most common are ‘Compacta’ ‘Densa’ and ‘Shamrock’. Of the three, ‘Shamrock’ is the most highly praised by Dr. Michael Dirr in his extensive text book Manual of Woody Landscape Plants.
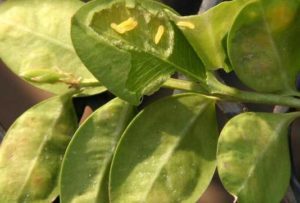 BOXWOOD LEAF MINERs are tiny orange, mosquito-like flies that live on and around boxwood plants. In late May-Early June, the adults emerge, having overwintered inside the leaves of the host plant. These pests are not strong fliers, so they usually hover a few inches from the host plants. Males and females emerge over a period of a week to 10 days and mate. Each female deposits up to 30 eggs inside the tender new growth and then dies within a few hours. Eggs hatch in a few weeks and the tiny orange larvae begin to feed on the tissue inside the leaf, causing a blister. The larvae overwinter in the leaf and resume feeding in spring. They pupate and then leave the blisters as adults, starting the process all over again. Affected leaves become tan and papery, usually shedding by August.
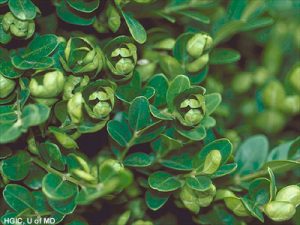 BOXWOOD PSYLLIDS are small insects resembling thrips or aphids. The adult stage has jumping legs and can spring out of the plants when disturbed. Adults appear in June and lay eggs between the leaf scales of immature buds in mid summer. The minute orange eggs overwinter there and hatch the following spring. Yellowish nymphs emerge at bud break in April or May. This stage has pointed mouth parts that are used to pierce the leaves and buds and suck out the sap. Their feeding distorts the new growth, causing the leaves to cup. The cupped leaves make a perfect shelter for the nymphs as they continue to feed and grow. Nymphs secrete a filamentous wax that accumulates in and around the cupped foliage. The wax clumps together in a fluffy mass that is easily blown into the air when the plants are brushed up against.
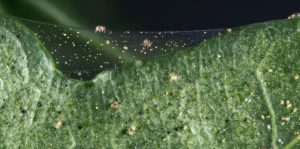 Identifying spider mites requires a little bit of detective work. If any kind of stippling or flecking is evident on the surface of boxwood leaves, suspect mites. Take a close look at the underside of the leaves. The shed exoskeletons and webbing can be seen with the naked eye, but the insects are so small it’s very difficult to see them without magnification. Pull a few affected leaves off the plant and tap them firmly on a white sheet of paper. Any mites will fall off onto the paper and they are much easier to see on the white background. Low populations of spider mites are often controlled by predatory insects in the environment naturally. However, larger infestations may cause leaves to turn brown and fall and do warrant control.
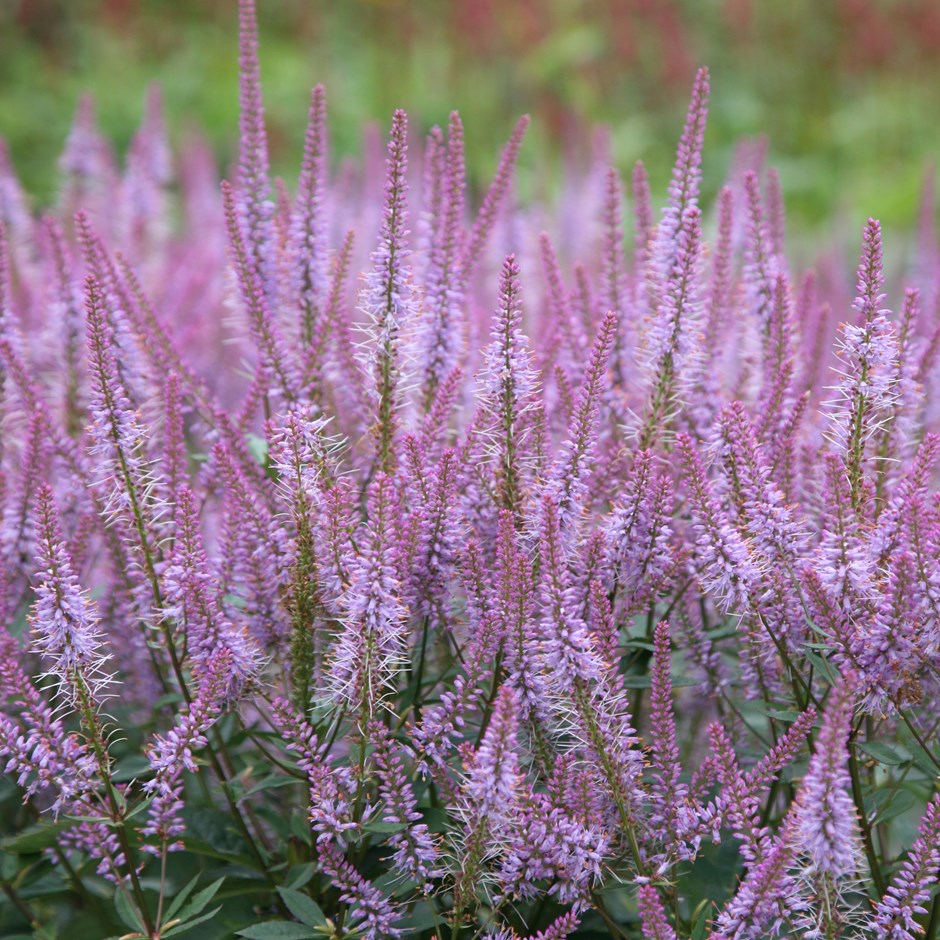
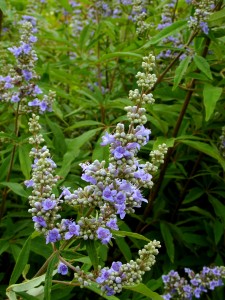
 I planted a big group of ‘Blue Butterfiles’ in the back of our garden last year, and have been very impressed with how sturdy their stems are and the plants overall size. Year two, they are easily 6′ tall, filling an area between two large Hydrangeas very effectively. I did notice considerable self-seeding this spring, but the volunteers were easily uprooted when they germinated and weren’t any trouble. The flowers are profuse and very pretty when they arrive in September, but certainly best enjoyed close up.
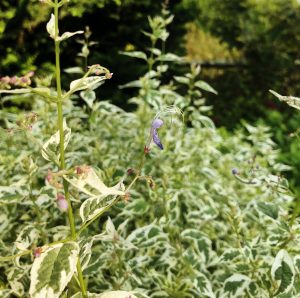 ‘Snow Fairy‘ in a different spot so that I could compare them. This plant has been a real star. So much so, that I am planning to plant another group further down this year. The best part of this selection is the splash of white in the foliage. When other plants are beginning to look tired with the heat of August, this Caryopteris is coming into its own. The mid-green leaves have a varying degree of variegation, giving the plant a bright fresh look. ‘Snow Fairy’ is shorter in stature than ‘Blue Butterflies’, making it more versatile. Ours are just beginning to flower at 4′ tall.
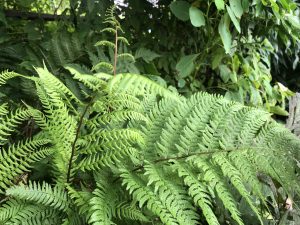 LADY FERN, Athyrium felix-femina cvs: This useful medium-sized fern (2-3′) grows best in fertile, moist soil with good drainage in light to dense shade. It’s lacy fronds are a pleasant light green arising from a round clump. It will tolerate full sun, with ample moisture, and is one of the few ferns that will thrive in the dry soils under large shade trees. If grown in ideal conditions, lady fern will slowly form a colony that completely covers the ground. Try ‘Lady in Red’ for a contrasting red stem.
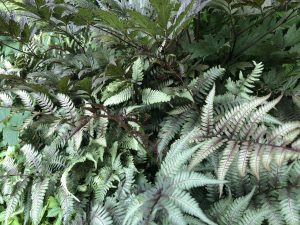 JAPANESE PAINTED FERN, Athyrium nipponicum cvs: This small to medium-sized (18-24″), colorful fern is best grown in fertile, evenly moist soil in light to dense shade. The most striking feature of these ferns are their purple and silver coloring which contrasts well with other shade plants. These are best kept in dappled to full shade as they will scorch in the sun. The most readily available cultivars are ‘Pictum’, ‘Branford Beauty’ and ‘Ghost’ but ‘Burgundy Lace’ is also a stunning plant to try.
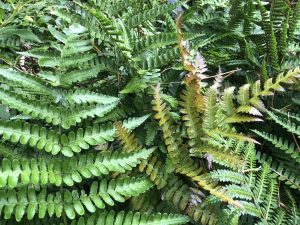 AUTUMN FERN, Dryopteris erythrosora: This is my favorite fern. They grow 1-3′ tall, preferring rich, evenly moist soil and dappled light to full shade. The young fronds emerge a coppery bronze and change to a glossy deep green as they mature. New fronds continue to emerge throughout the growing season, so there is always some contrast between the young and mature fronds. When they are happy, Autumn Ferns will spread to form a dense colony. BONUS: these ferns are evergreen, and continue to look fresh long past frost. Tidy them up in spring before new growth emerges to keep them looking their best. ‘Brilliance’ is even showier than the species with brighter copper coloring
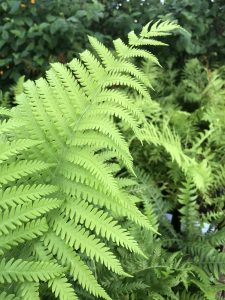 OSTRICH FERN, Matteuccia struthiopteris cvs: Ostrich fern is a stately addition to shady gardens with minimal exposure. These ferns have tall (3+’), medium/light green, erect, delicate fronds that are particularly suited to deep shade and moist fertile soils. As they mature, the black root stock begins to rise above the soil level. Never attempt to shorten the root stock, this procedure generally kills the plant. Working with these ferns over the years, I’ve found them to burn out in August unless grown in deep shade, with constant moisture. The fronds are also prone to easily breaking, so they are best used in the back of the shady garden, where they are less likely to get damaged. Try ‘The King’ in areas where burning out is a concern; this cultivar seems to do better than the species in dappled light.
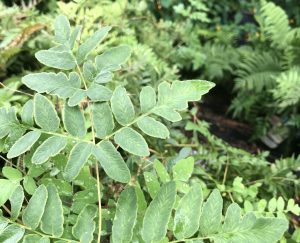 ROYAL FERN, Osmunda regalis: These ferns are a New England native, performing well in moist, fertile soils in dappled to deep shade. Depending on conditions, they will grow between 2 and 5′ tall with a loose spreading habit. Royal ferns have a unique look among ferns; the fronds have leaflets that are much rounder than others, resembling plants in the pea family. Their fertile fronds rise above the foliage, contrasting with the medium green leaves. Like ostrich ferns, these ferns will form a root stalk as they age that should not be disturbed with pruning of any kind.
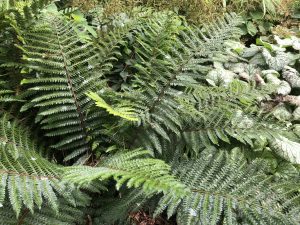 JAPANESE TASSEL FERN, Polystichum polyblepharum: I’ve always admired this evergreen fern for it’s glossy green leaves and rounded habit. In our garden it forms adjoining clumps that are 2′ tall and about 3′ wide. We leave the foliage until spring to clean up, trimming it off before new fronds emerge.
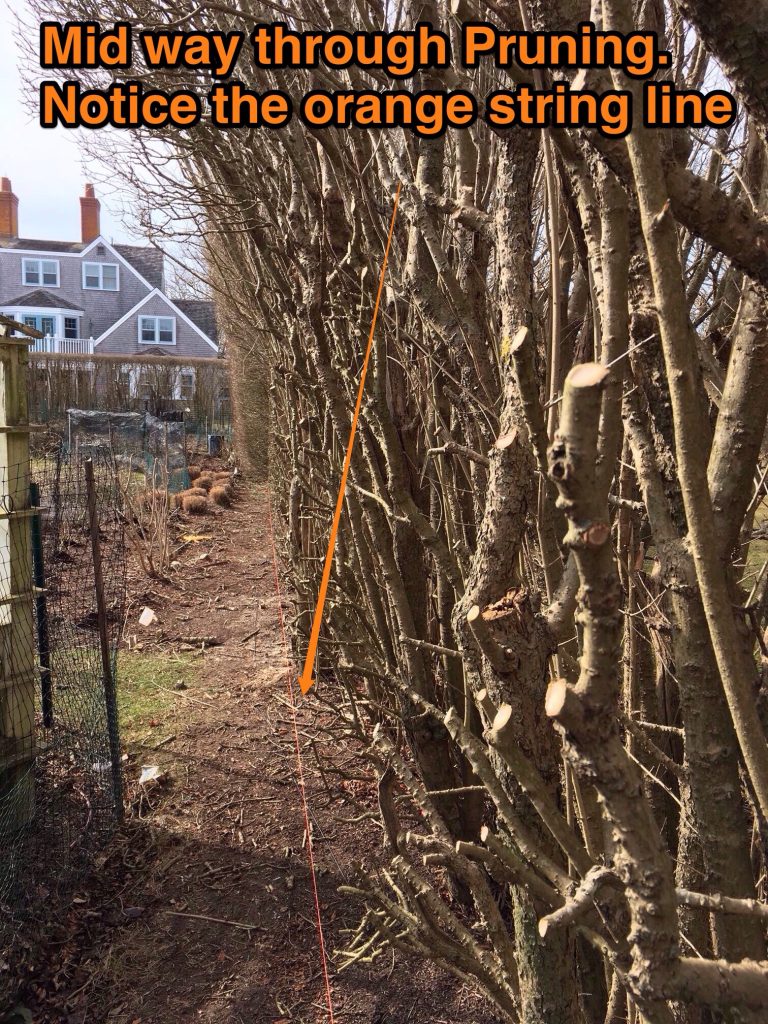
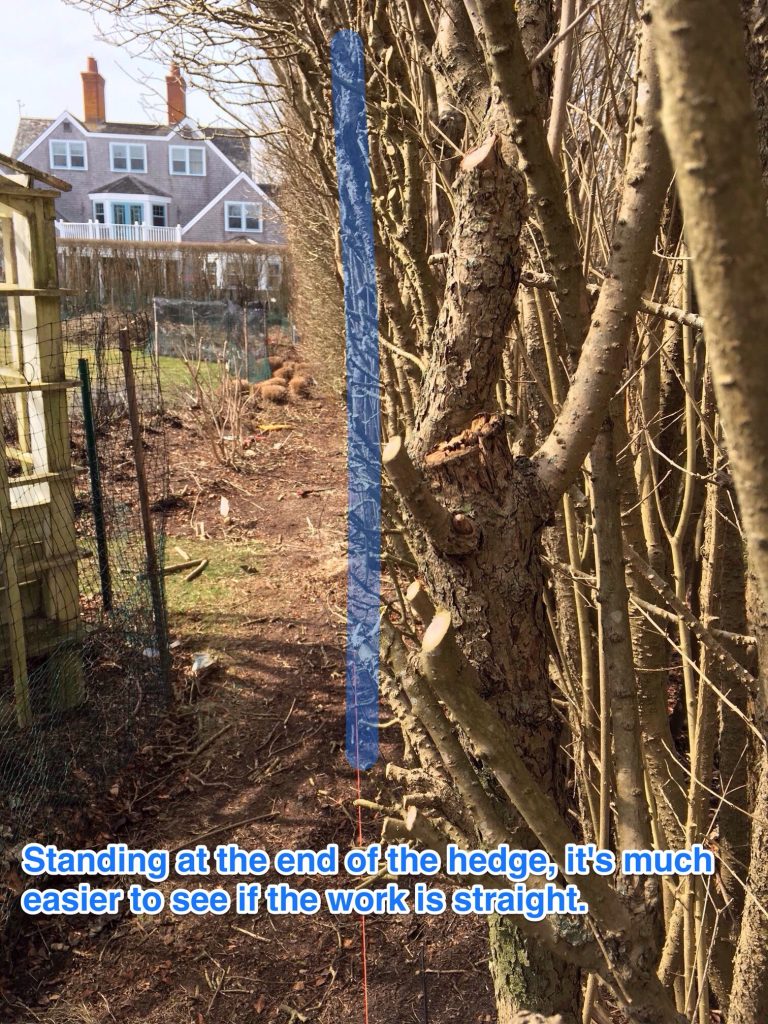
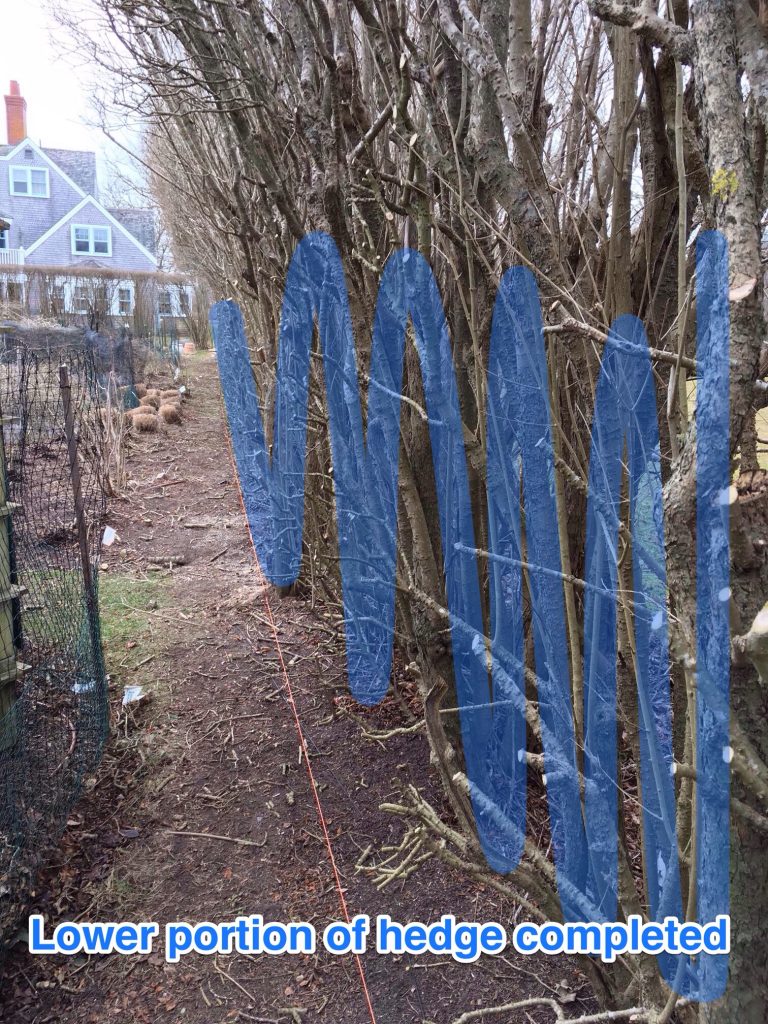
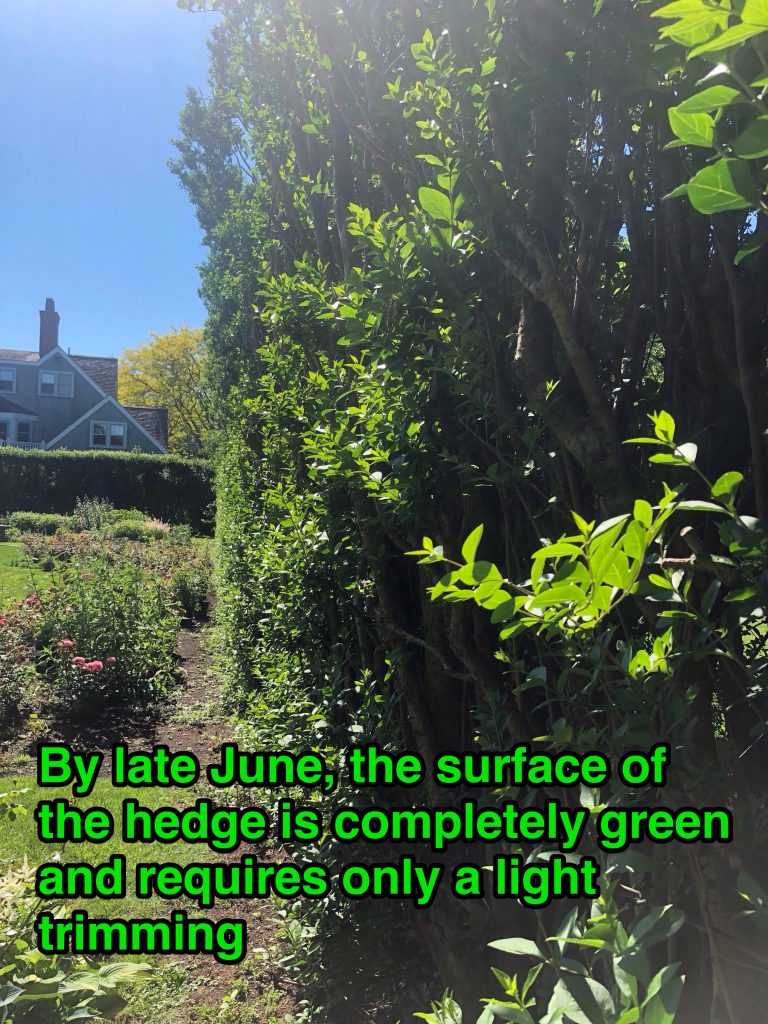
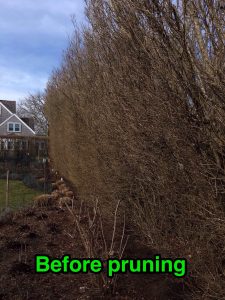 Shearing hedges is a necessary part of maintenance, but this practice can cause problems in the long run. When woody plants are repeatedly sheared, a dense layer of tiny twigs builds up on the outside, shading the interior stems and inhibiting dormant buds from sprouting. As hedges age, dead wood can also accumulate in the center. It’s not so much that it’s wrong to shear hedges; it’s more a matter of realizing that in order to keep a hedge healthy in the long run, renovation is required from time to time. Removing the dense growth on the outside allows sunlight to fall on the dormant buds below, stimulating strong, healthy, new growth. It also makes it much easier to saw out dead branches and scout for insect pests like scale and thrips that live directly on the bark. This procedure is best done during the dormant season.
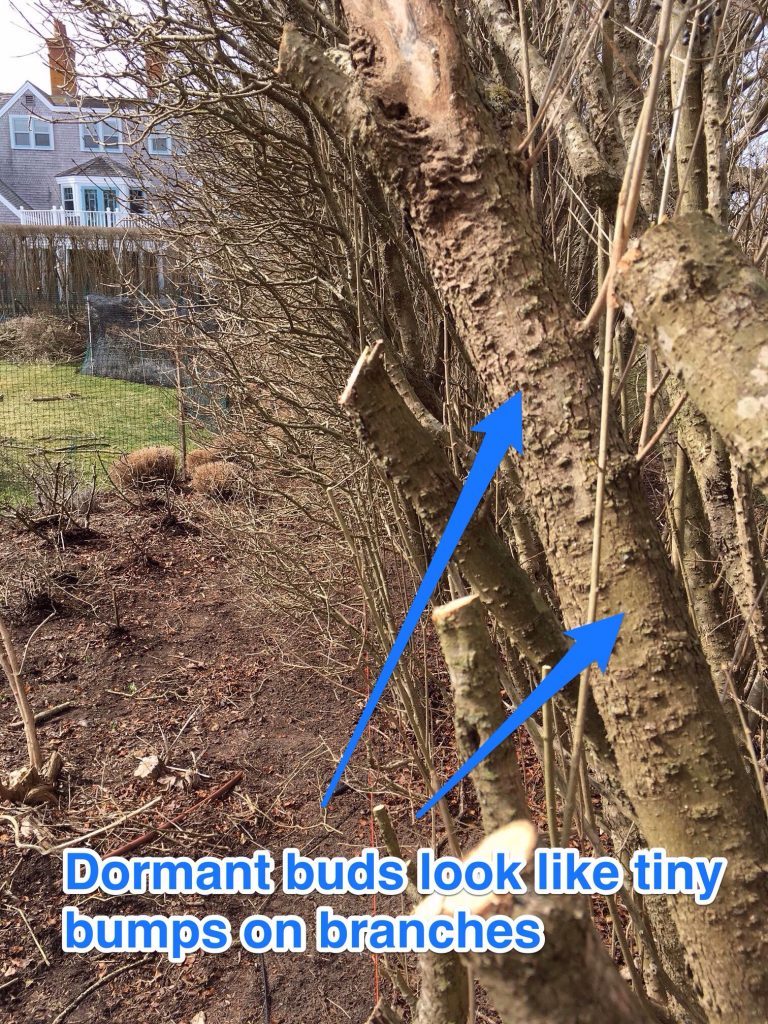
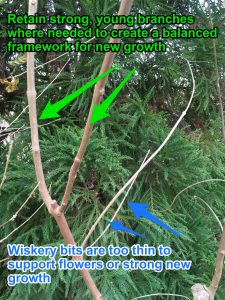
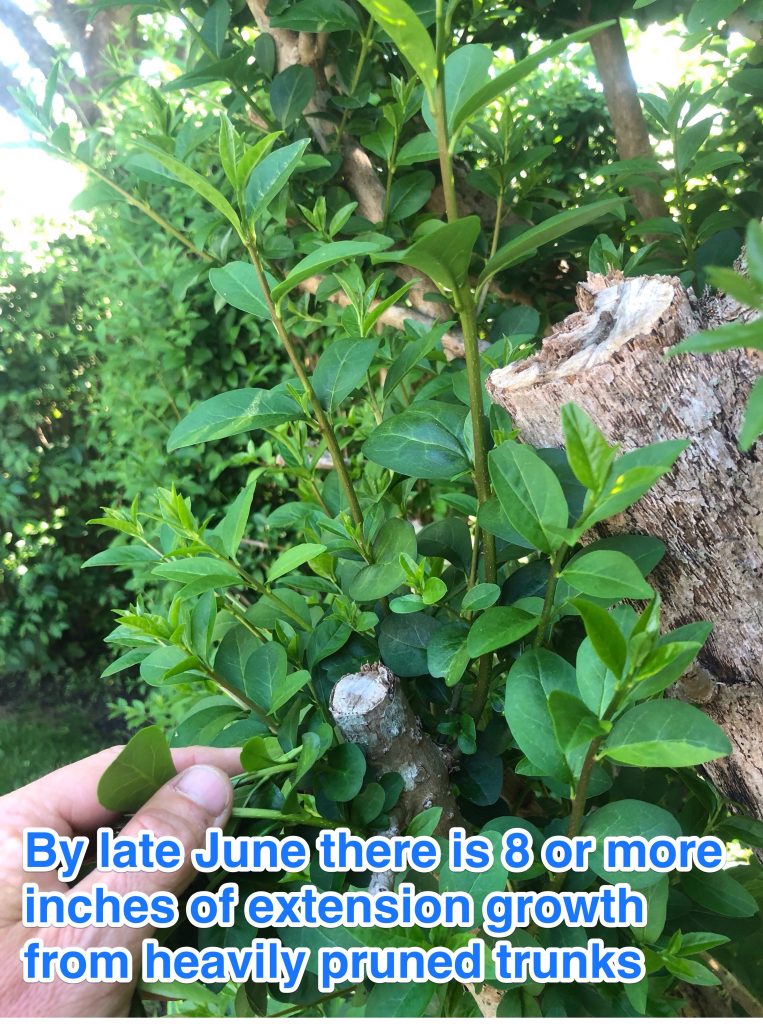 Be sure to use the proper tools for the job. Branches narrower than ½” in diameter can be cut with regular hand pruners. Branches up to 1” should be cut with sharp loppers. Anything wider than an inch should be cut with a hand-held pruning saw or chainsaw.
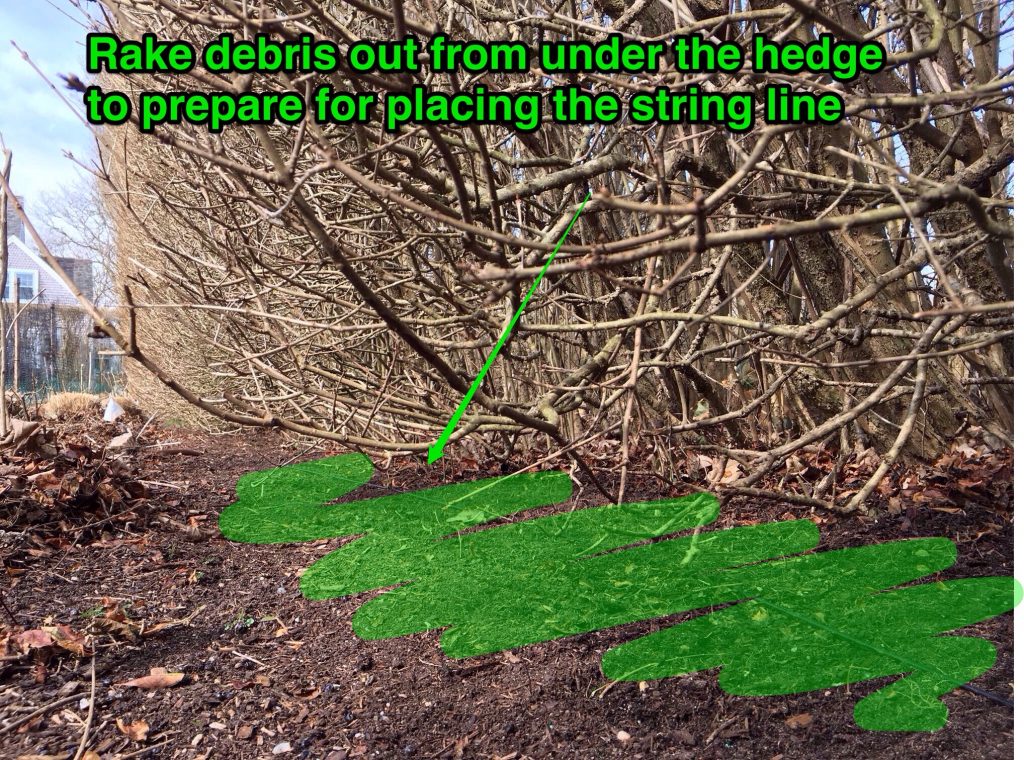
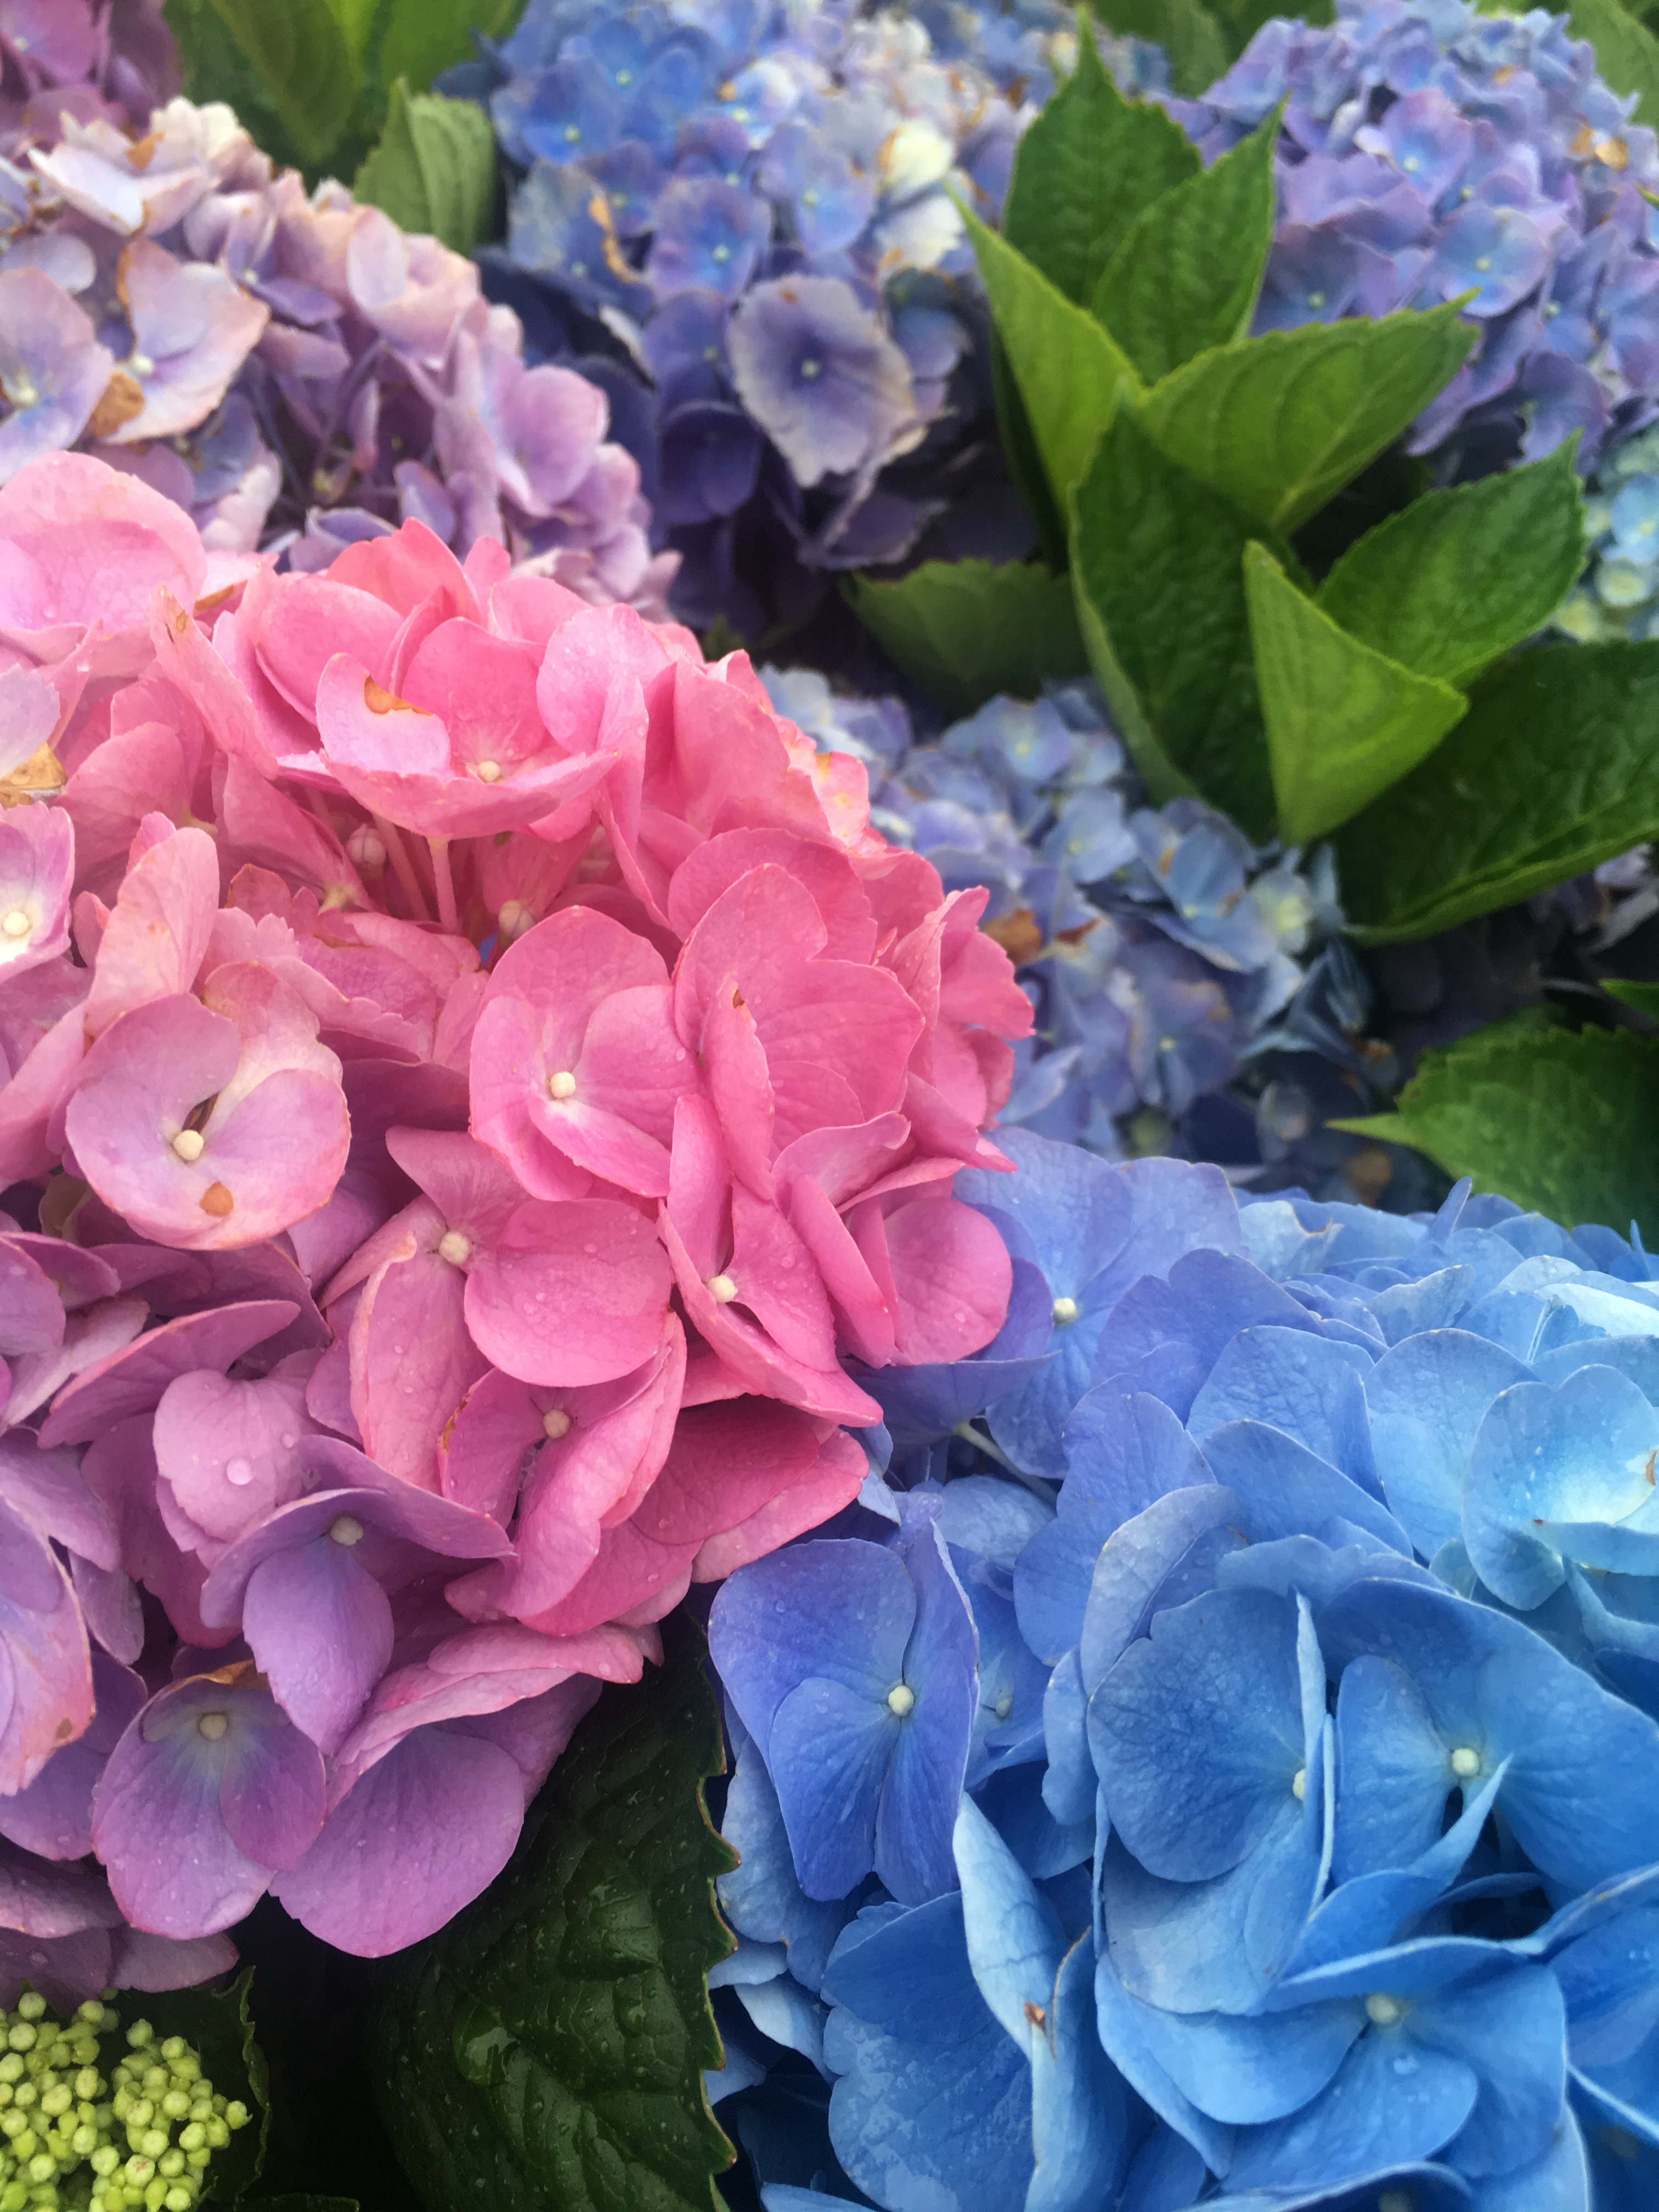
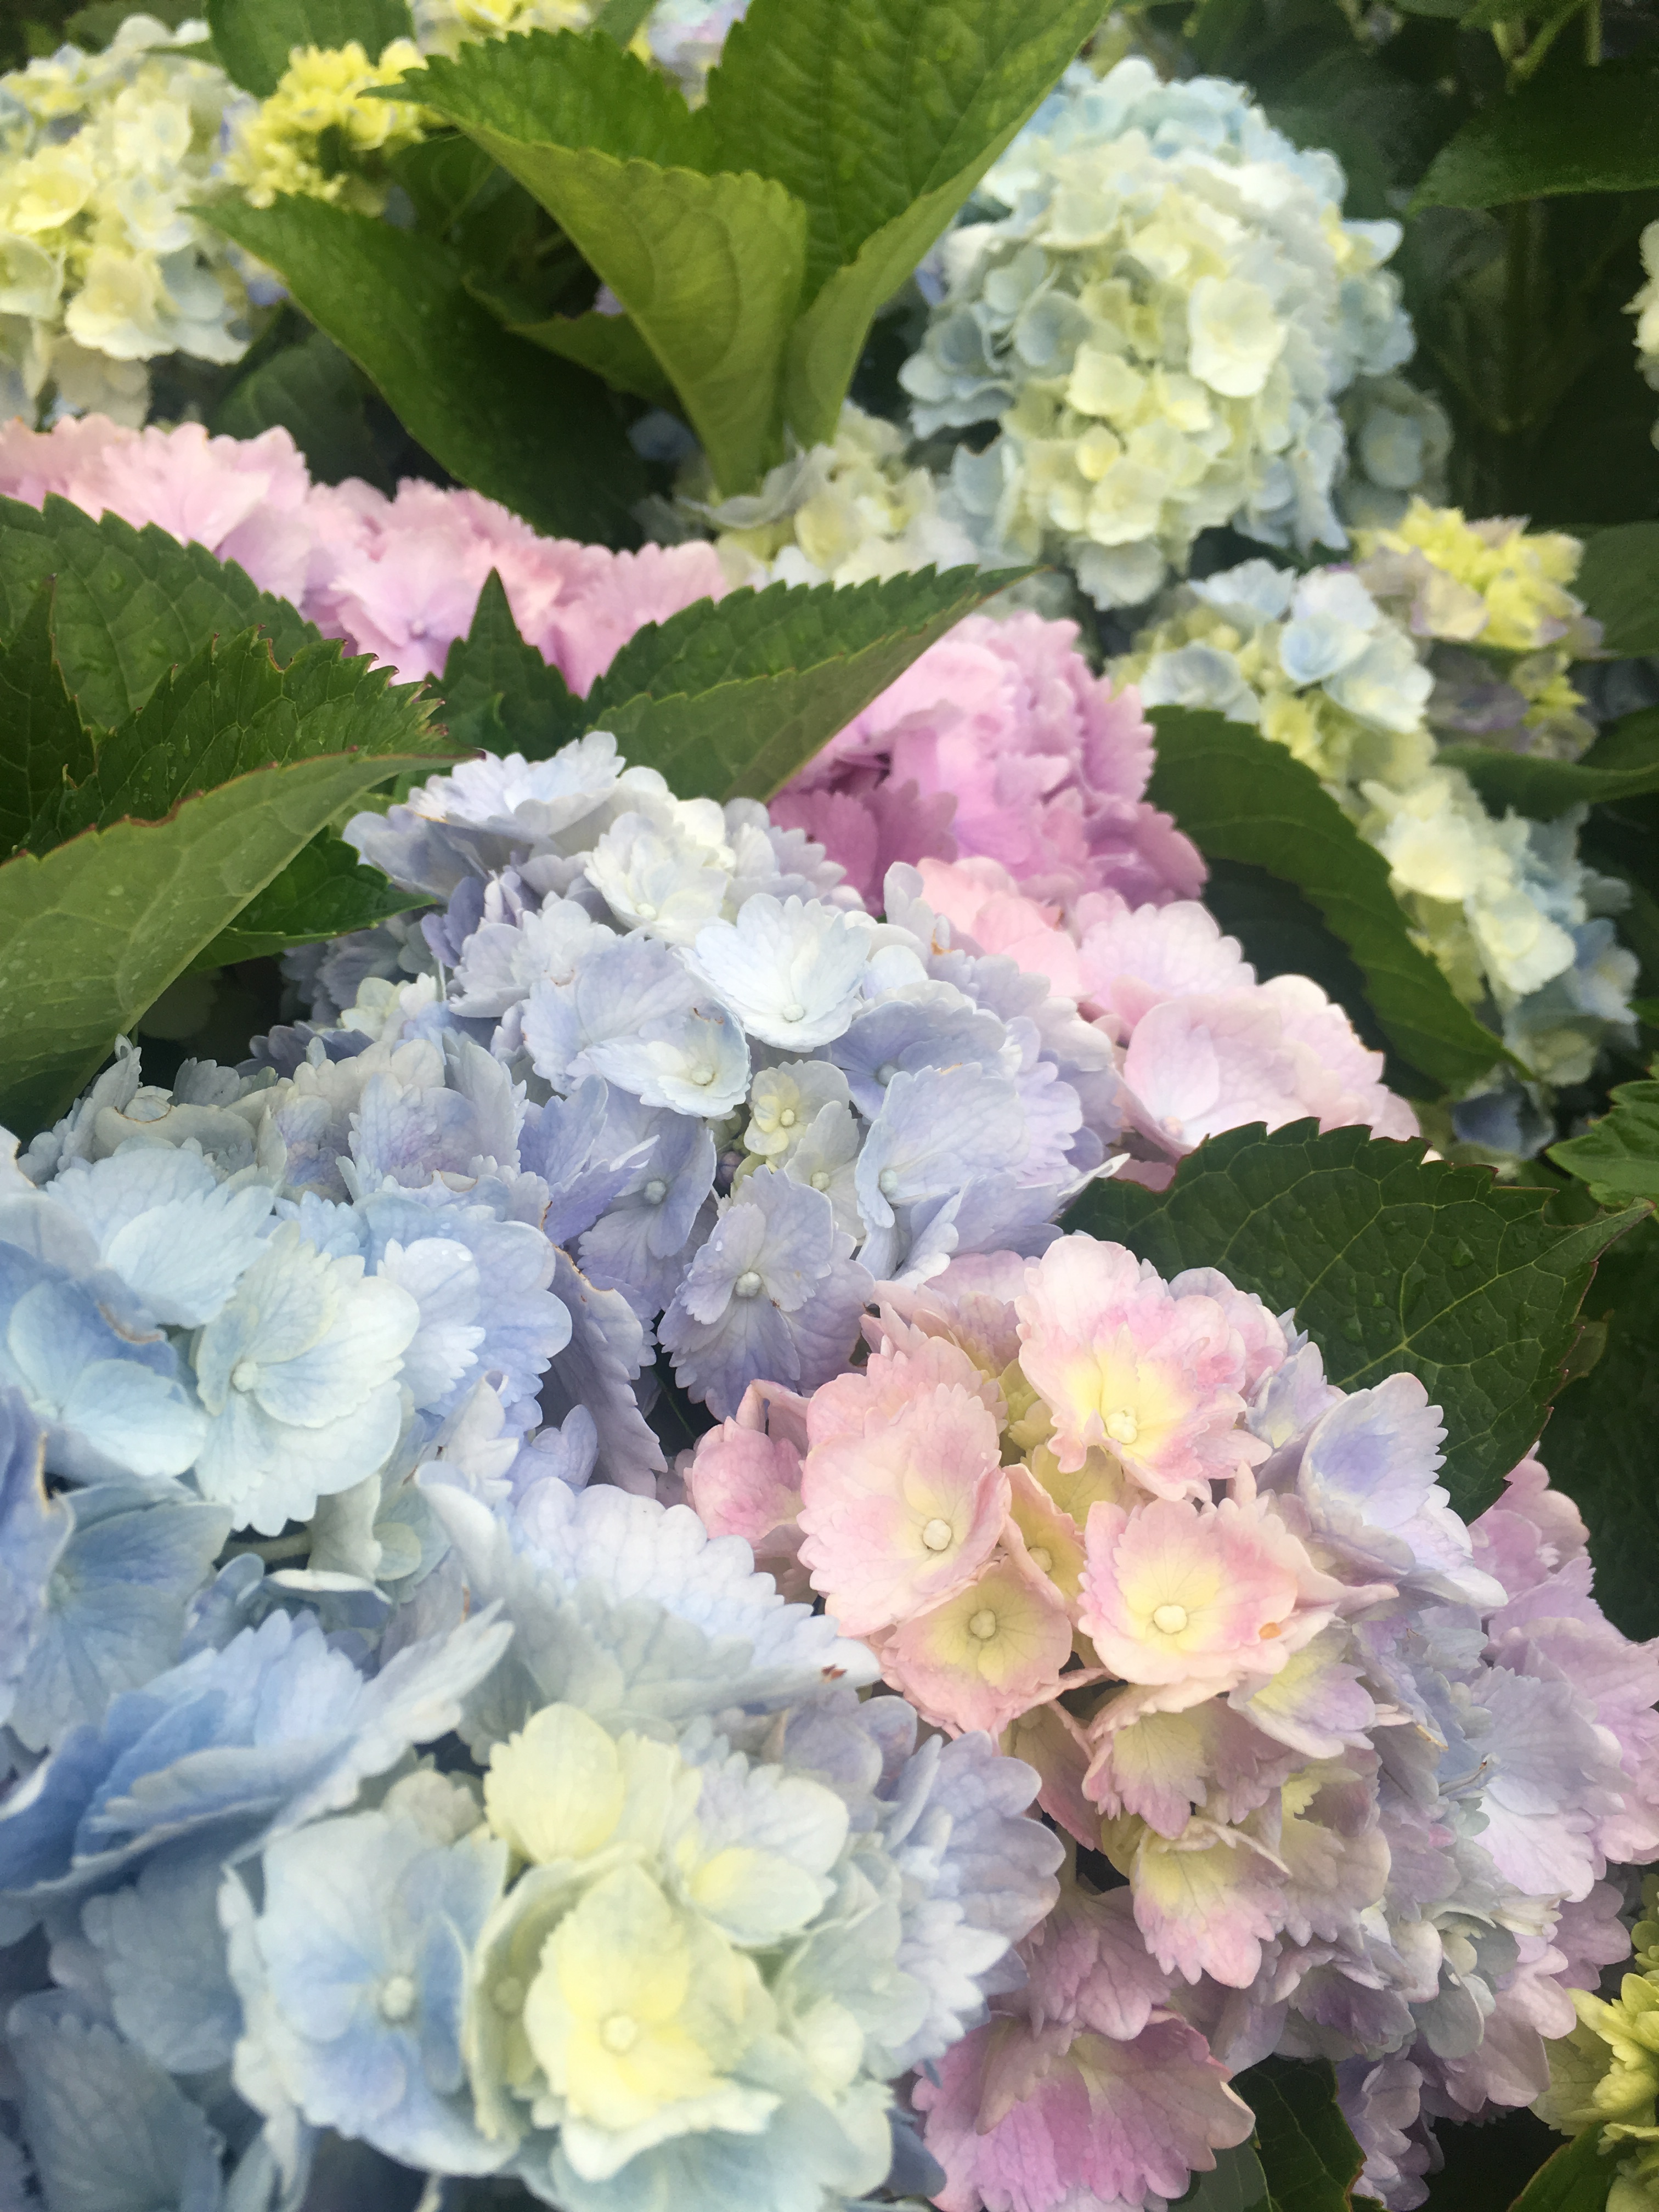
 Surfing Hydrangea Nursery has been supplying plants to Nantucket’s homeowners and landscape professionals for 20 years. During that time, we have built a list of vendors from all over the country and as far away as Canada. Using this wide network of providers, we are able to source just about any plant at any specification that can be brought to the island. We encourage homeowners and landscapers to send us plant lists for upcoming projects. We are happy to quote large jobs, and are often able to provide discounts on volume orders. Let us do the work of sourcing and shipping the plants for you! And keep in mind, we are able to deliver any of the plants we sell to the job site.