In this video, Brad demonstrates how to prune Pee Gee Hydrangea shrubs.
Woody Ornamentals
Boxwood Blight
Cylandrocladium pseudonaviculatum or C. buxicola
Boxwood blight is a serious fungal infection of all plants in the genus Buxus. It is also known to infect Pachysandra. Although research is ongoing, we do know what it looks like and how it infects plants. During warm humid weather, spores of the Cylandrocladium fungus germinate on the moist leaves and stems of Boxwood. Wounds are not necessary for the fungus to enter the tissue. Brown spots with dark edges appear on the leaves, as well as blights, black cankers on stems and subsequent rapid defoliation and dieback. The disease life cycle can be completed within one week during optimum weather conditions.
Boxwood blight is not spread through airborne spores like other fungal infections. Spores are held together in sticky masses and are transferred to other plants by direct contact, use of infected tools, splashing and wind-driven rain. Fungicides are being studied that will limit the spread of the disease, but so far there is no cure. Sanitation is paramount to limit spread of boxwood blight. Disinfect tools between plants during maintenance practices, such as shearing. Remove and destroy infected plants, fallen leaves and stems. Inoculum can survive in leaf litter for at least 10 years and cause new infections.
Currently, experts recommend not introducing new boxwood to historical or significant gardens until more study is done.
Research has shown that Buxus sempervirens ‘Suffruticosa’, Dwarf English Boxwood, is extremely susceptible to this blight. We have begun to limit stock of this type of boxwood. If ‘Suffruticosa’ is needed for a project we will ship it in, but require that customers take receipt of the entire shipment upon arrival.
We are taking all prudent steps to identify, contain and destroy infected plants that are found in the nursery, and will keep our customers up to date with new research as it becomes available.
Further information about Boxwood Blight can be found at http://www.boxwoodblight.org and University extension sites.
Check out our Pinterest board for photos of Boxwood Blight, and other fungal infections and pests that affect Boxwood: http://www.pinterest.com/surfhydrangea/boxwood-blight-and-other-pestsdiseases-of-boxwood/
Dappled Willow
Salix x integra ‘Hakuru Nishiki’

I always enjoy monitoring trends in gardening. One of the plants that has begun to gain in popularity is dappled willow. This versatile plant is easy to grow and suitable for many applications in the garden. The young pink twigs are beautiful even before the leaves begin to show in spring. But the real show is in June, when the entire shrub billows with pink, white and green leaves.
Smaller plants make excellent container specimens all by themselves or look beautiful under-planted with colorful annuals. Larger shrubs are very effective planted in groups in larger landscapes, or alone to punctuate areas of the garden with their fluffy foliage. Allowed to grow to a larger size and sheared a few times a year, they can make a lovely hedge as well.
Gardeners are not limited to a shrub form, either. We often sell them grown as a standard tree. They are very ornamental and easily maintained, with a yearly trim. In a large pot, they would really look great, highlighting corners of a patio, or placed at the entry to a stately home. Or plant a larger one right in the ground, where a small tree is needed.
Dappled willow grow well in many conditions, but thrive in wet, fertile soils. They perform in full sun to part shade. If planted in a pot, be sure to keep them well-watered. If they dry out once, the tips will tend to wilt and brown.
The look of these plants can be manipulated with thoughtful pruning while dormant. Once established, hard pruning produces an abundance of pink twigs and the best variegation. Standard trees can be allowed to grow wild and wooly, or tightly trimmed to produce a fun lollipop look.
So, give them a try – we love them and it’s awfully fun impressing your friends by rattling off the name in Japanese -Hakaru Nishiki!
For more photos, check out our pinterest board, Dappled Willow
-Brad MacDonald
Blueberries

Backyard fruit and veggie gardening is a big trend in gardening these days. It’s a real treat to pick your own blueberries instead of buying them from the Stop and Shop at $5.00 a quart! They are easy to grow and delicious eaten right off of the bush, or with cream and sugar after dinner on a warm July night.
There are two basic types of blueberries, high bush (Vaccinium corymbosum) and low bush (Vaccinium angustifolium) (there are also half-high varieties, but lets not get into that right now). Low bush blueberries are the kind that I grew up calling “Wild Blueberries” in Nova Scotia. They grow along the ground forming a dense groundcover less than a foot high.
The fruit is small and flavorful, but somewhat of a hassle to harvest. I will never forget my first summer job hand-raking blueberries. My brother and I were bussed out to the country where the fields were all marked off into rows for picking. The blueberry rake looks much like an old fashioned cranberry rake. It’s a metal box with lots of tines close together on the bottom and a handle on top. The entire day is spent bent over scooping up berries and pouring them into buckets to be weighed. We were paid by the pound, but at the rate we picked, I’m not sure if we averaged any more than thirty dollars a day. I don’t quite remember how long it took for us to be fired, but I know it wasn’t longer than a week or two. Lets just say, I wouldn’t make a good itinerant fruit harvester.
High bush blueberries are more shrubby, growing up to six feet tall. They produce a crop of large berries held off the ground on the tips of the branches. Blueberry bushes are not self-fruitful. In order to get a good crop it is important to plant at least two different varieties close to each other. It’s also important to pay attention to when the cultivars flower – early, mid or late. In order to cross-pollinate, all the bushes must be in flower at the same time. Try not to plant only one early and one late variety, as they might not overlap flowering period.
Blueberries prefer consistently moist, fertile soil that is slightly acidic. In order to make them as happy as possible, amend the soil well at the time of planting, and consider using an acidifying fertilizer like Holly Tone if your soil is on the sweeter side. Always plant blueberries in full sun to maximize the amount of flower buds set and the proper ripening of the fruit. If your plants are happy they will fruit the first year, and bear a very good crop by the third year. Consider pruning the plants after the third or fourth year to keep new, productive canes coming up from the base of the plant. Check out YouTube for some great videos on Blueberry pruning http://youtu.be/fm6ZfpGy5oQ
I have compiled the following fact sheet with information on blueberries that are commonly available to us at Surfing Hydrangea to help our customers select the varieties that best suit their needs: Blueberry fact sheet
-Brad MacDonald
Planting Mature Trees
Installing mature trees into new landscapes has become a major trend across the country. Every year, we sell hundreds of mature trees that are planted on the island. Over the years, it has become clear that improperly planted trees don’t stand a chance on the Grey Lady. Gardeners that don’t understand the science of tree planting are at a distinct disadvantage.
Goal: Promote rapid root growth to reduce water stress. Trees dug from the field are left with less than 20% of the fine water absorbing root hairs they need to support the canopy.
Large trees are grown in the field at production tree farms on the mainland. When trees reach a salable size they are dug out of the ground with a mechanical tree spade. The wide root system that the tree once had to support the canopy is mostly left behind. Once the tree and root ball are lifted, the root ball is wrapped in burlap, twine, and often a wire cage. These coverings keep the root ball intact, so that it can be transported and planted later on. Trees are packed on flat bed trailers or box trucks with their bare branches tied tightly together. Many of the trees we sell at the nursery travel thousands of miles on the highway before taking the ferry to Nantucket!
Keeping in mind the production method, it’s clear that the major goal in planting large trees is rapid regeneration of water-absorbing fine roots. Scientific studies have proven that many common planting practices are harmful, and possibly fatal to trees. Here is the short list of major DON’T s:
• Don’t dig a narrow hole with steep sides.
• Don’t plant trees too deep.
• Don’t put ANYTHING on top of a newly planted tree’s root ball – NO MULCH, NO SOIL.
• Don’t plant a tree unless follow-up watering and care is available for the first TWO years after planting.
• Don’t waste money on excessive amounts of backfill amendments.
• Don’t aggressively tamp backfill soil around the root ball.
If at all possible, plant trees in spring or early fall. Trees planted while just waking from dormancy have far less water needs than a tree in full leaf.
Follow these steps to plant trees properly according to the most recent science:
1. Determine the depth of the planting hole:
• First, measure the height of the root ball. Keep in mind: most trees are actually low in the root ball, with too much soil on top of the roots. Use a screwdriver or other thin implement to gently poke into the top of the root ball to find the depth of the first two to three structural roots. These roots should lie no more than two inches below the top of the ball. If they are deeper, subtract that from the original depth, making the hole shallower.
• The top of the root ball will sit one or two inches above grade, subtract one or two more inches to account for that, as well.
2. Dig the hole:
• The ideal planting hole will be saucer shaped (sloping sides), three times the width of the root ball, and at the proper depth, with undisturbed soil on the bottom.
• The shape of the hole is the MOST important factor in aiding rapid root growth. A hole with straight sides encourages roots to circle in the hole, and eventually girdle the trunk, causing death of the tree. The width of the hole is the second factor. The wider the hole, the better, as roots can quickly grow in lighter soil, with adequate pore space.
3. Put the tree in the hole:
• Large trees have extremely heavy root balls. A ball cart can be used for smaller root balls, or a skids steer for larger ones. Once the tree is next to the hole it can either be rolled in (for smaller root balls) or eased in with the forks of the machine (for larger trees). Enormous trees are planted with the help of a crane. However the tree is delivered to the hole, be sure it is placed straight, with the appropriate face in the appropriate direction. If the hole appears too deep once the tree is in place, remove it and add soil to the bottom of the hole, tamping it firmly so that no further settling will occur.
4. Remove any covering on the top 2/3 of the root ball:
• It has been proven time and again that burlap, twine and metal cages DO hamper root growth, especially when trees are planted improperly. Why risk it? Cut the top of the metal cage off with bolt cutters and the burlap with a utility knife. Leave the lower portion of the cage and burlap in place, the vast majority of tree roots grow out from the root ball, not down.
5. Stabilize the root ball:
• Shovel a small ring of backfill soil around the root ball.
• Tamp the soil in place firmly.
6. Backfill the tree:
• Considerable debate surrounds whether or not to amend backfill soil for trees. The prevailing wisdom is that excessive amendments do more harm than good. However, in lean soils (like on the majority of Nantucket) adding 5% or so of organic matter will help with soil texture, and water and nutrient retention.
• Shovel the back fill into the hole, without any further compacting.
• Do not place any soil on top of the root ball. Allow it to sit above grade with the top of the root ball showing.
7. Stake the tree, if it is deemed necessary:
• Staking is a whole other can of worms. It is preferable to leave trees un-staked. If staking is necessary, be sure the lines used to keep the tree stable are loose enough to allow for some flexion of the trunk.
8. Water the tree to settle the soil, and hydrate the roots.
9. Mulch the new root zone:
• Another Hot topic! Recent studies have shown that mulch is best used to cover the backfill area and anticipated root zone, not the root ball, and certainly not ever touching the trunk.
This article summarizes practices outlined in the Colorado State University CMG GardenNotes #633. Check it out for more in depth information on best tree planting practices.
Pruning Climbing Roses
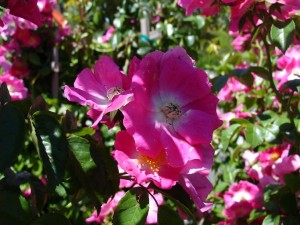
When pruning climbing roses, I find it easiest to group them into two main categories: Modern Climbers and Ramblers.
Modern Climbers like ‘New Dawn’ are large roses that can easily grow to two stories tall or more. They bloom in June on old wood and some varieties will bloom again, later in the season on both new and old wood. These roses don’t tend to put up more than a few new basal canes each year, so a permanent framework of older canes is left in place to cover the trellis.
Rambling roses like the large ‘American Pillar’ and smaller ‘Excelsa’ types tend to send up numerous, vigorous shoots from the base of the plant each year. The larger of this group can easily spread up a tree or along a split-rail fence, and the smaller varieties can be used as ground covers or to adorn shorter sections of fencing. Some of this group bloom only in Early summer and others are touted to be “ever-blooming,” but they are all pruned in a similar fashion, no matter their size or bloom period. These roses are best grown on long fences, or pillars, and the oldest canes are completely removed annually.
Keep in mind the following objectives when pruning any climbing rose:
- To remove weak, broken, diseased, old and unproductive wood
- To encourage new, vigorous replacement growth
- To maximize healthy wood that will flower in the upcoming season
- To tie in strong canes to cover empty areas of the trellis or support
Follow these steps to prune Modern Climbing Roses:
(‘New Dawn’, ‘Blaze’, ‘White Dawn’, ‘Iceberg’, ‘Zepherine Drouhin’, ‘Eden’, ‘Golden Showers’ ‘Aloha’ etc.)
- Take a good look at the trellis. Consider using strong growth that is less than two years old to replace older, weak or diseased wood. Pull these canes aside until pruning is complete so that they can be tied in, to cover empty areas.
- Remove any dead branches to healthy wood. Healthy wood will be relatively soft with a green ring just under the thin outer bark. The center of the cane will be white, not brown or hollow. When removing any long growth, cut it into several short sections to avoid damaging neighboring canes as you pull it away from the trellis
- Remove some of the spindly growth, smaller in diameter than a pencil.
- Cut back any long canes that extend beyond the trellis, if they cannot be used to fill a space on the support
- Tip back all long laterals that sprout from main canes to cigarette length (three to four buds), encouraging production of flowering shoots. Make all cuts just above a bud that will grow in a beneficial direction.
- Consider removing a few of the most complicated branches that have been formed over the years with annual pruning. These areas are often at the top and sides of the trellis.
- Once the bulk of the pruning is done, assess structural concerns: Look at the entire rose and how it covers the trellis; the goal is to have the best possible coverage of the trellis, with no canes growing behind the trellis and with main canes in a horizontal position, parallel to each other. No rose will be perfect, but move and tie any easily-repositioned canes into the best position.
- Tie in any strong replacement growth, that was kept aside when pruning begun.
- Replace any twine that is disintegrated, being sure all canes are well-secured to the trellis.
Follow these steps to prune Rambling Roses:
(‘American Pillar’, Rosa wichuriana,’William Baffin’, ‘Super Excelsa’, ‘Super Dorothy’ ‘Himalayan Musk’, etc)
- Remove any dead branches to healthy wood. Healthy wood will be relatively soft with a green ring just under the thin outer bark. The center of the cane will be white, not brown or hollow. When removing any long growth, cut it into several short sections to avoid damaging neighboring canes as you pull it away from the trellis
- Remove a third of the flowered canes from previous seasons. Cut these canes right down to ground level to encourage new strong growth in the upcoming season. Be certain to preserve healthy young canes less than three years old.
- Remove some of the spindly growth, smaller than a pencil in diameter.
- Cut back any overly long canes that cannot be tied into the trellis
- Tip back all long laterals that sprout from main canes to cigarette length (three to four buds max), encouraging production of flowering shoots. Make all cuts just above a bud that will grow in a beneficial direction.
- Once the bulk of the pruning is done, assess structural concerns: Look at the entire rose and how it covers the support; the goal is to have the best possible coverage of the support, with no canes growing behind the trellis and with main canes in a horizontal position, parallel to each other. No rose will be perfect, but move and tie any easily moved canes into the best position.
Viburnums we Love
Viburnum is a huge genus of shrubs, both native and exotic. In fact, the venerable horticulture writer Michael A. Dirr devotes an entire book just to viburnums. We sell hundreds of this versatile, easy to grow shrub each year, and with good reason. Because there are so many, one might say there is a Viburnum for almost any purpose in the landscape.
We stock many common viburnums in a variety of sizes. Consider using one or more of the viburnums when you need a plant to fit the following situations: a semi-evergreen plant for screening, an upright plant for hedges, a showy highlight to a shrub border, a native plant to attract wildlife, a specimen for the small in-town garden, a plant to add a beautiful fragrance to a well-travelled area, or to fill a spot in a hedgerow, the list goes on.
Most viburnums will grow in average garden conditions, from full sun to part shade. Arrowwood, in particular will tolerate almost any soil type from lean to rich, moist to dry. However, more ornamental types will appreciate good soil and consistent watering to perform their best.
Below is a list of common viburnums and their characteristics:
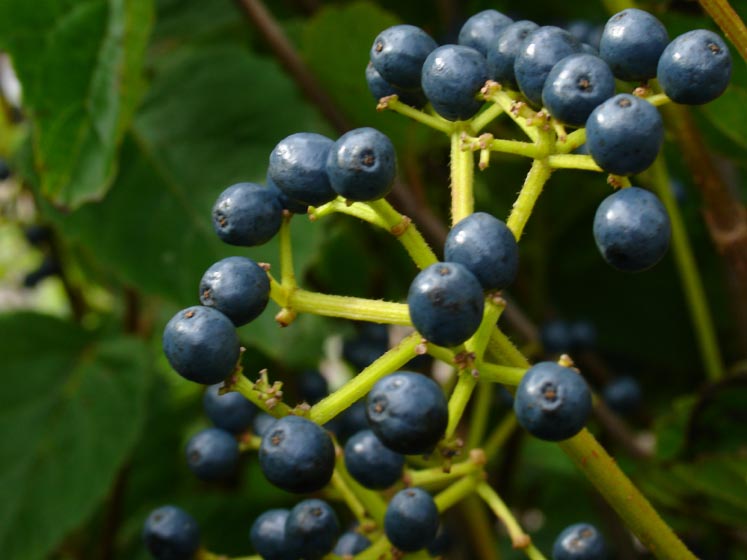
Viburnum dentatum
(Arrowwood Viburnum)
This group of viburnums is native to North America and is well-suited to many areas of the island. They are all deciduous and have green, glossy, serrated leaves with with variable fall color. Their lacecap-shaped, white flowers appear in early summer, but are not particularly showy. However, they do produce deep blue/black berries that are somewhat ornamental and attractive to wildlife. These are mostly upright to gently arching, multi-stemmed shrubs that are suitable for informal hedges, native plantings, and to fill in hedgerows for screening at the perimeter of properties during summer.
Autumn Jazz (r): Bred for fall color, this variety tends to color up better than the species in the autumn with shades of yellow, orange, red and burgundy. It is one of the taller varieties, reaching 8-10 feet in ideal growing conditions.
Blue Muffin (r): Aptly named by the trade mark holders, Proven Winners, this newer arrowwood viburnum has striking light blue berries. It is a more compact selection, and should not grow taller than 7 feet.
‘Chicago Luster’: The “go to” dentatum for many landscapers; this plant is meant to be an overall improvement on the species. However, I would find it extremely difficult to tell the two apart. ‘Chicago Luster’ will grow up to 10 feet tall in wooded areas where exposure is limited.
Viburnum plicatum var. tomentosum
(Doublefile Viburnum)
This group of viburnums are native to China And Japan. The are deciduous with green, serrated, crinkled leaves that have a fuzzy under-side (tomentose). Fall color is not always appreciable, but is usually burgundy when apparent. Their elegant, white, lacecap-shaped flowers appear all along the branches in early summer. They do produce small berries, but the real show here is in the flowers! Their form is much more horizontal than arrowwood viburnums; pagoda-like in age, forming tiers of branches. They are suited to add to a large shrub border, where they are allowed to grow to mature size without constant pruning. Or site them closer to the house, and expect an annual trim to keep them in check. We also sell standard tree forms that would fit well into a garden in town as a lovely ornamental tree.
‘Marieseii’: Often confused with ‘Lanarth’ When in flower, this is my favorite viburnum, bar none. Introduced in 1870’s, this plant has stood the test of time. I would recommend only formative pruning, allowing the graceful natural form to develop. A mature specimen should reach 10 feet high.
‘Shasta’: Similar to ‘Mariesii’, this newer cultivar (introduced in 1979), is one of the large-flowered types that does not re-bloom. It tends to be shorter and broader than ‘Mariesii’, becoming wider than tall. Expect a mature plant to be between 8-10′ tall and 10-12 feet wide.
‘Summer Snowflake’: This is probably the most popular of the doublefile viburnums we sell at the nursery. I just wanted to clear up a few misconceptions about this plant. Although the tags all proclaim it to be “ever-blooming”, this plant does not flower heavily all season. The bulk of flowers arise in early summer, during the initial bloom period, when the entire shrub will be in full flower. But as summer moves along, the flowering slows down considerably and the effect is more like a pfffft of flowers here or there among the leaves. Also, keep in mind, this is not a dwarf in any respect. I’ve seen so many ‘Summer Snowflake’s planted in tight spots and pruned to within an inch of their lives. They are full-sized doublefile viburnums and will reach upwards of 10 feet, and nearly the same spread, if left unpruned.
Viburnum sieboldii ‘Seneca’
(Seneca Siebold Viburnum)
Seneca viburnum is probably the largest viburnum that we sell. Mature specimens will reach upwards of 20 and perhaps even 30 feet in ideal conditions. This plant could be considered more of a small multi-stem tree, if grown appropriately. The flowers appear just as the foliage is opening in early summer, making them extremely visible. Later as the flowers fade, the red fruit take the gardeners attention as they contrast with the large, rounded leaves. The distinct odor produced by crushing the leaf of a Siebold viburnum will always set it apart from others and make it easily identified.
American Holly
Ilex opaca
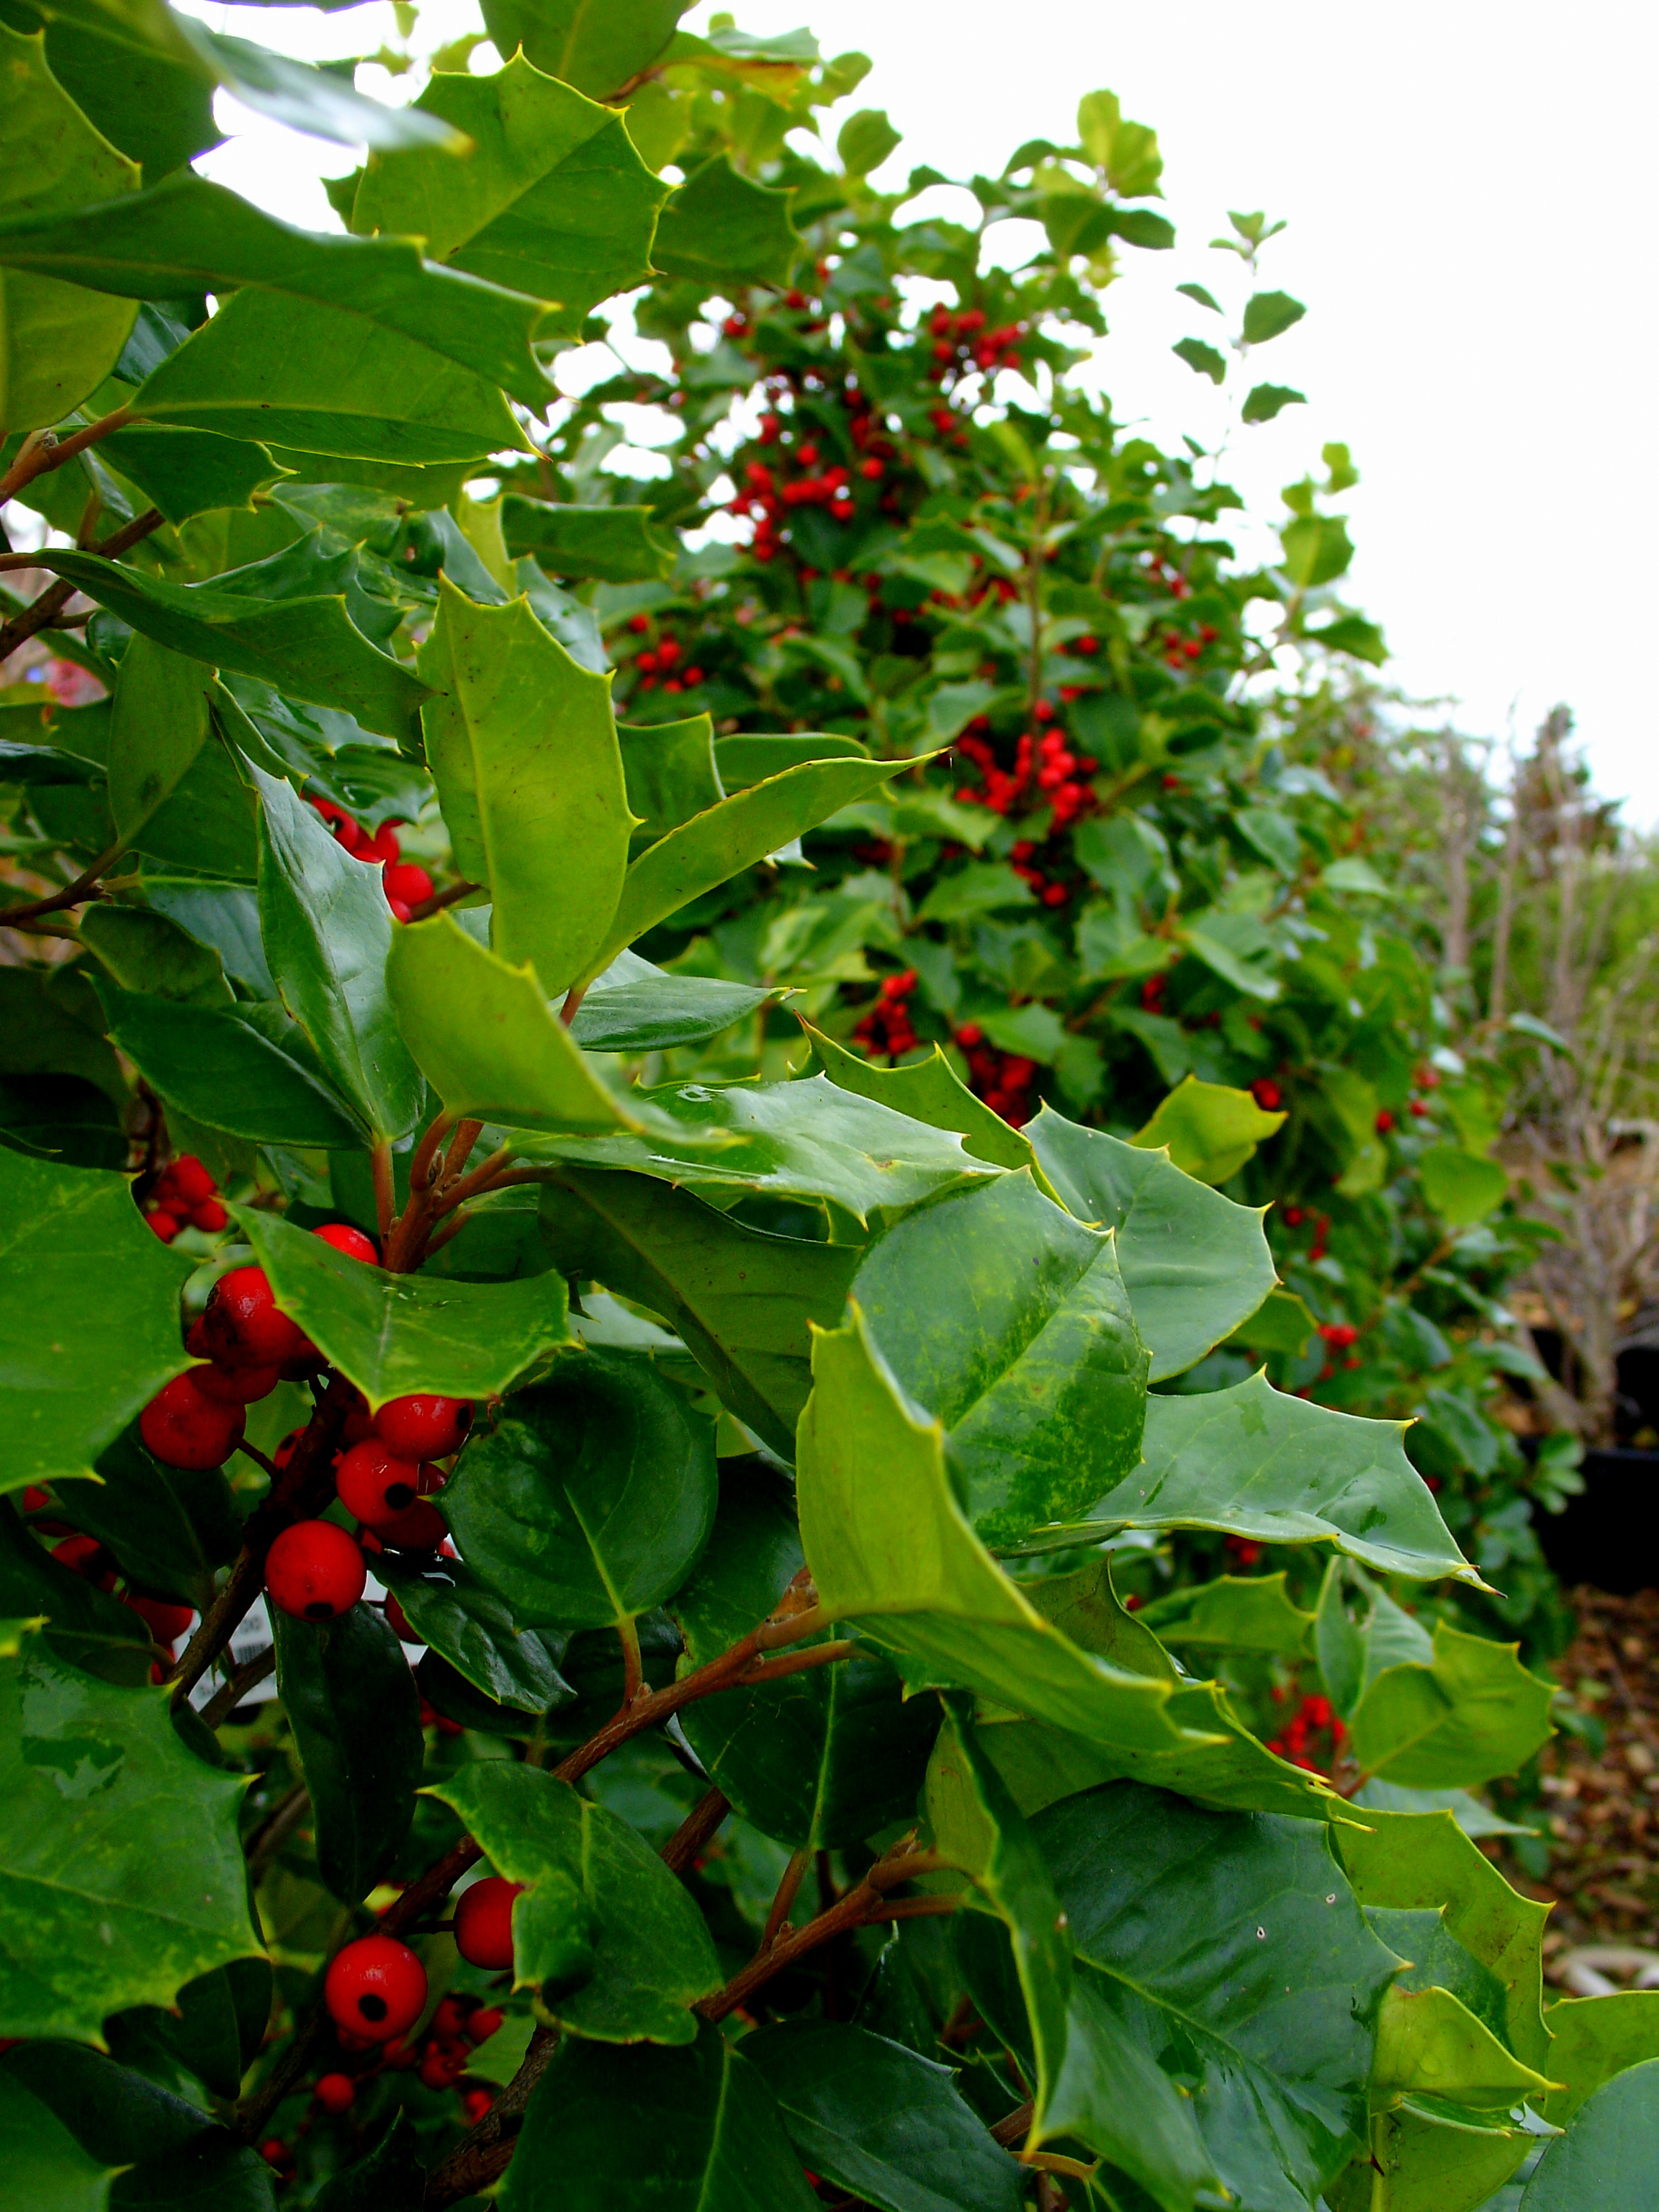
American Holly is one of the most statuesque native trees that we sell here at the nursery. Mature specimens are a sight to behold. If you have ever taken a walk through Squam Swamp, you have already walked past several beautiful examples.
Young American hollies tend to be a little funny looking, with an uneven habit. But in age, these trees are widely pyramidal with ascending branches, and generally quite symmetrical – Well worth the wait! They grow slowly to 30 feet in height, and spread out to 15-30 feet wide.
The leaves are very tough and spiny, ranging in color from a yellowish-olive to a deep, lustrous green. They are among a very small number of evergreen trees that the deer stay away from. Keep in mind they are monoecious, meaning male and female flowers are borne on separate plants. Only females will have berries, but they do require a male to pollinate the flowers for proper fruit set. ‘Jersey Knight’ is a male cultivar that is often used to pollinate females.
We are happy to have a number of excellent specimens in stock in a variety of sizes. It’s still early enough to plant, so stop by and we would be happy to show them to you.
Hardy Camellia
Camellia sasanqua
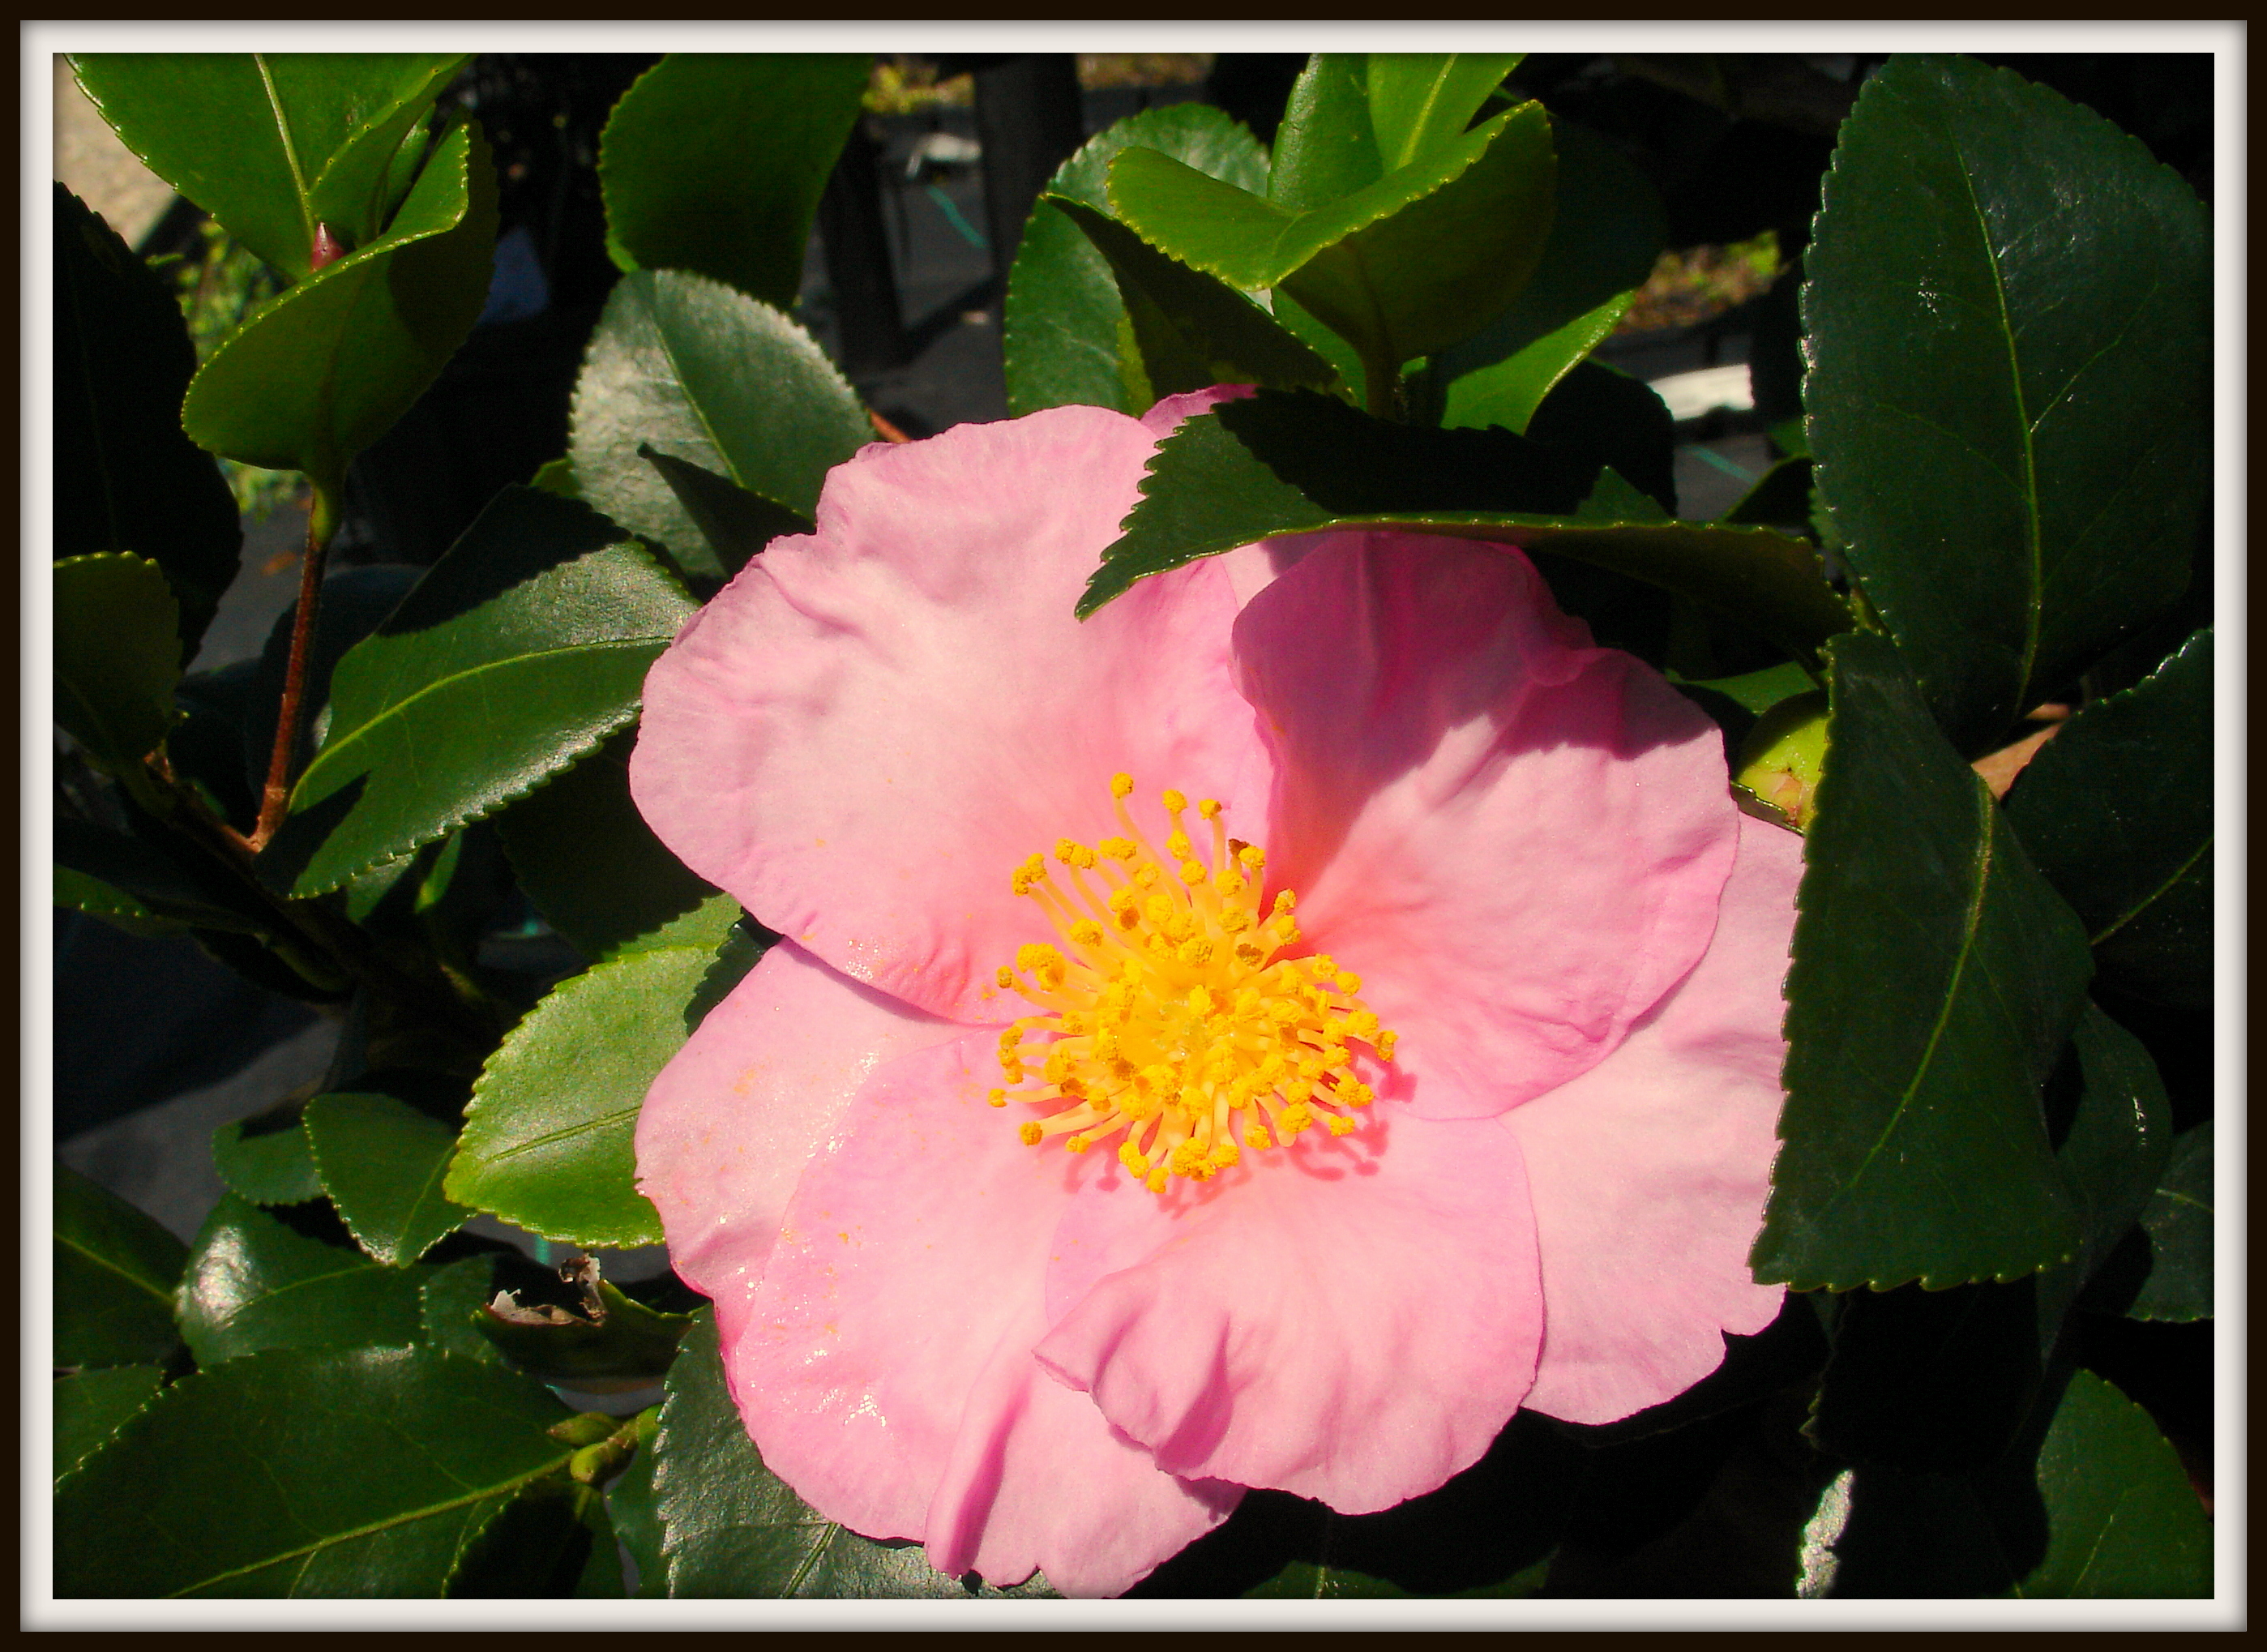 This woody evergreen is a show stopper – come check them out! They are slow growing, but eventually get 6 to 10 feet high and 8 ft wide. Dense branches explode with beautiful dark green polished foliage. This single pink flower opens around September and blooms till December in full shade or partial sun.
It is an attractive landscape plant and another interesting possibility for a hedge having a pyramidal to oval form. It is supposedly a deer-resistant plant, but we all know Nantucket deer seem to be happy making a meal from just about any plant.
We have the ‘Long Island Pink’ variety currently in stock. It could be a lovely alternative to the everyday privet privacy screen, or an attractive feature next to your front door. Try it out, we expect you will enjoy the results!
-Carmen Carey
Off-Island Nursery Tour
One of the highlights of last week for Britt and I was a visit to several of our purveyors off-island. After a long summer of selling plants here at Surfing Hydrangea, it was a real treat to take a business trip. With over thirty years combined experience in the green industry, we still find a trip to see our growers valuable and interesting.
Our first day was spent with a morning of travel and a visit to a grower with a vast series of fields and green houses. Literally thousands of cultivars of annuals perennials, shrubs, grasses and trees were neatly row-ed up in groups at various stages of growth. We were told they have over 40 miles of cover able green houses! I was particularly taken aback by the hydrangeas. We sell a great deal of hydrangeas each year, and at times I feel like I am swimming in mop-heads and floating on a sea of panicles. But I was stunned to see thousands upon thousands of ‘Endless Summer’ hydrangeas in their customary blue pots.
Perspective. The green industry is huge.
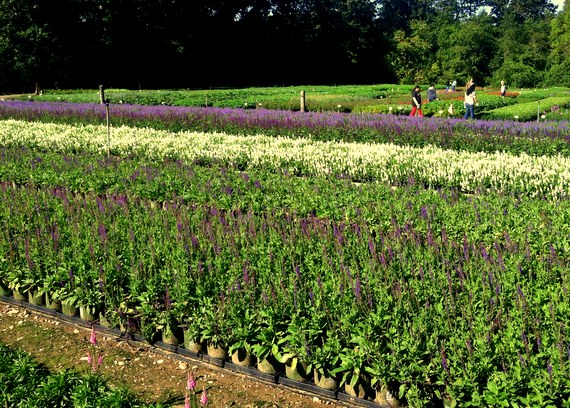 On our second day we visited one of our favorite growers in Franklin, CT. This operation grows the best quality perennials and vines in our region. We walked around fields and fields of flowers in full bloom. I was surprised to see that their largest crop of shade plants were grown outside under a huge stand of oak trees. It reminded me of our little shade section, shaded by a stand of aging pines. Even when growing is more and more mechanized, it’s refreshing to know that low-tech, natural approaches still have a place.
The hectic pace of summer past, and a great visit to our growers behind us, we’re back at Surfing Hydrangea, re-invigorated and ready to power through the fall. Plants are Cool!
-Brad MacDonald