Garden Notes

Garden Notes

Lady’s Mantle

Alchemilla

Salix 'Hakuru Nishiki' and Alchemilla
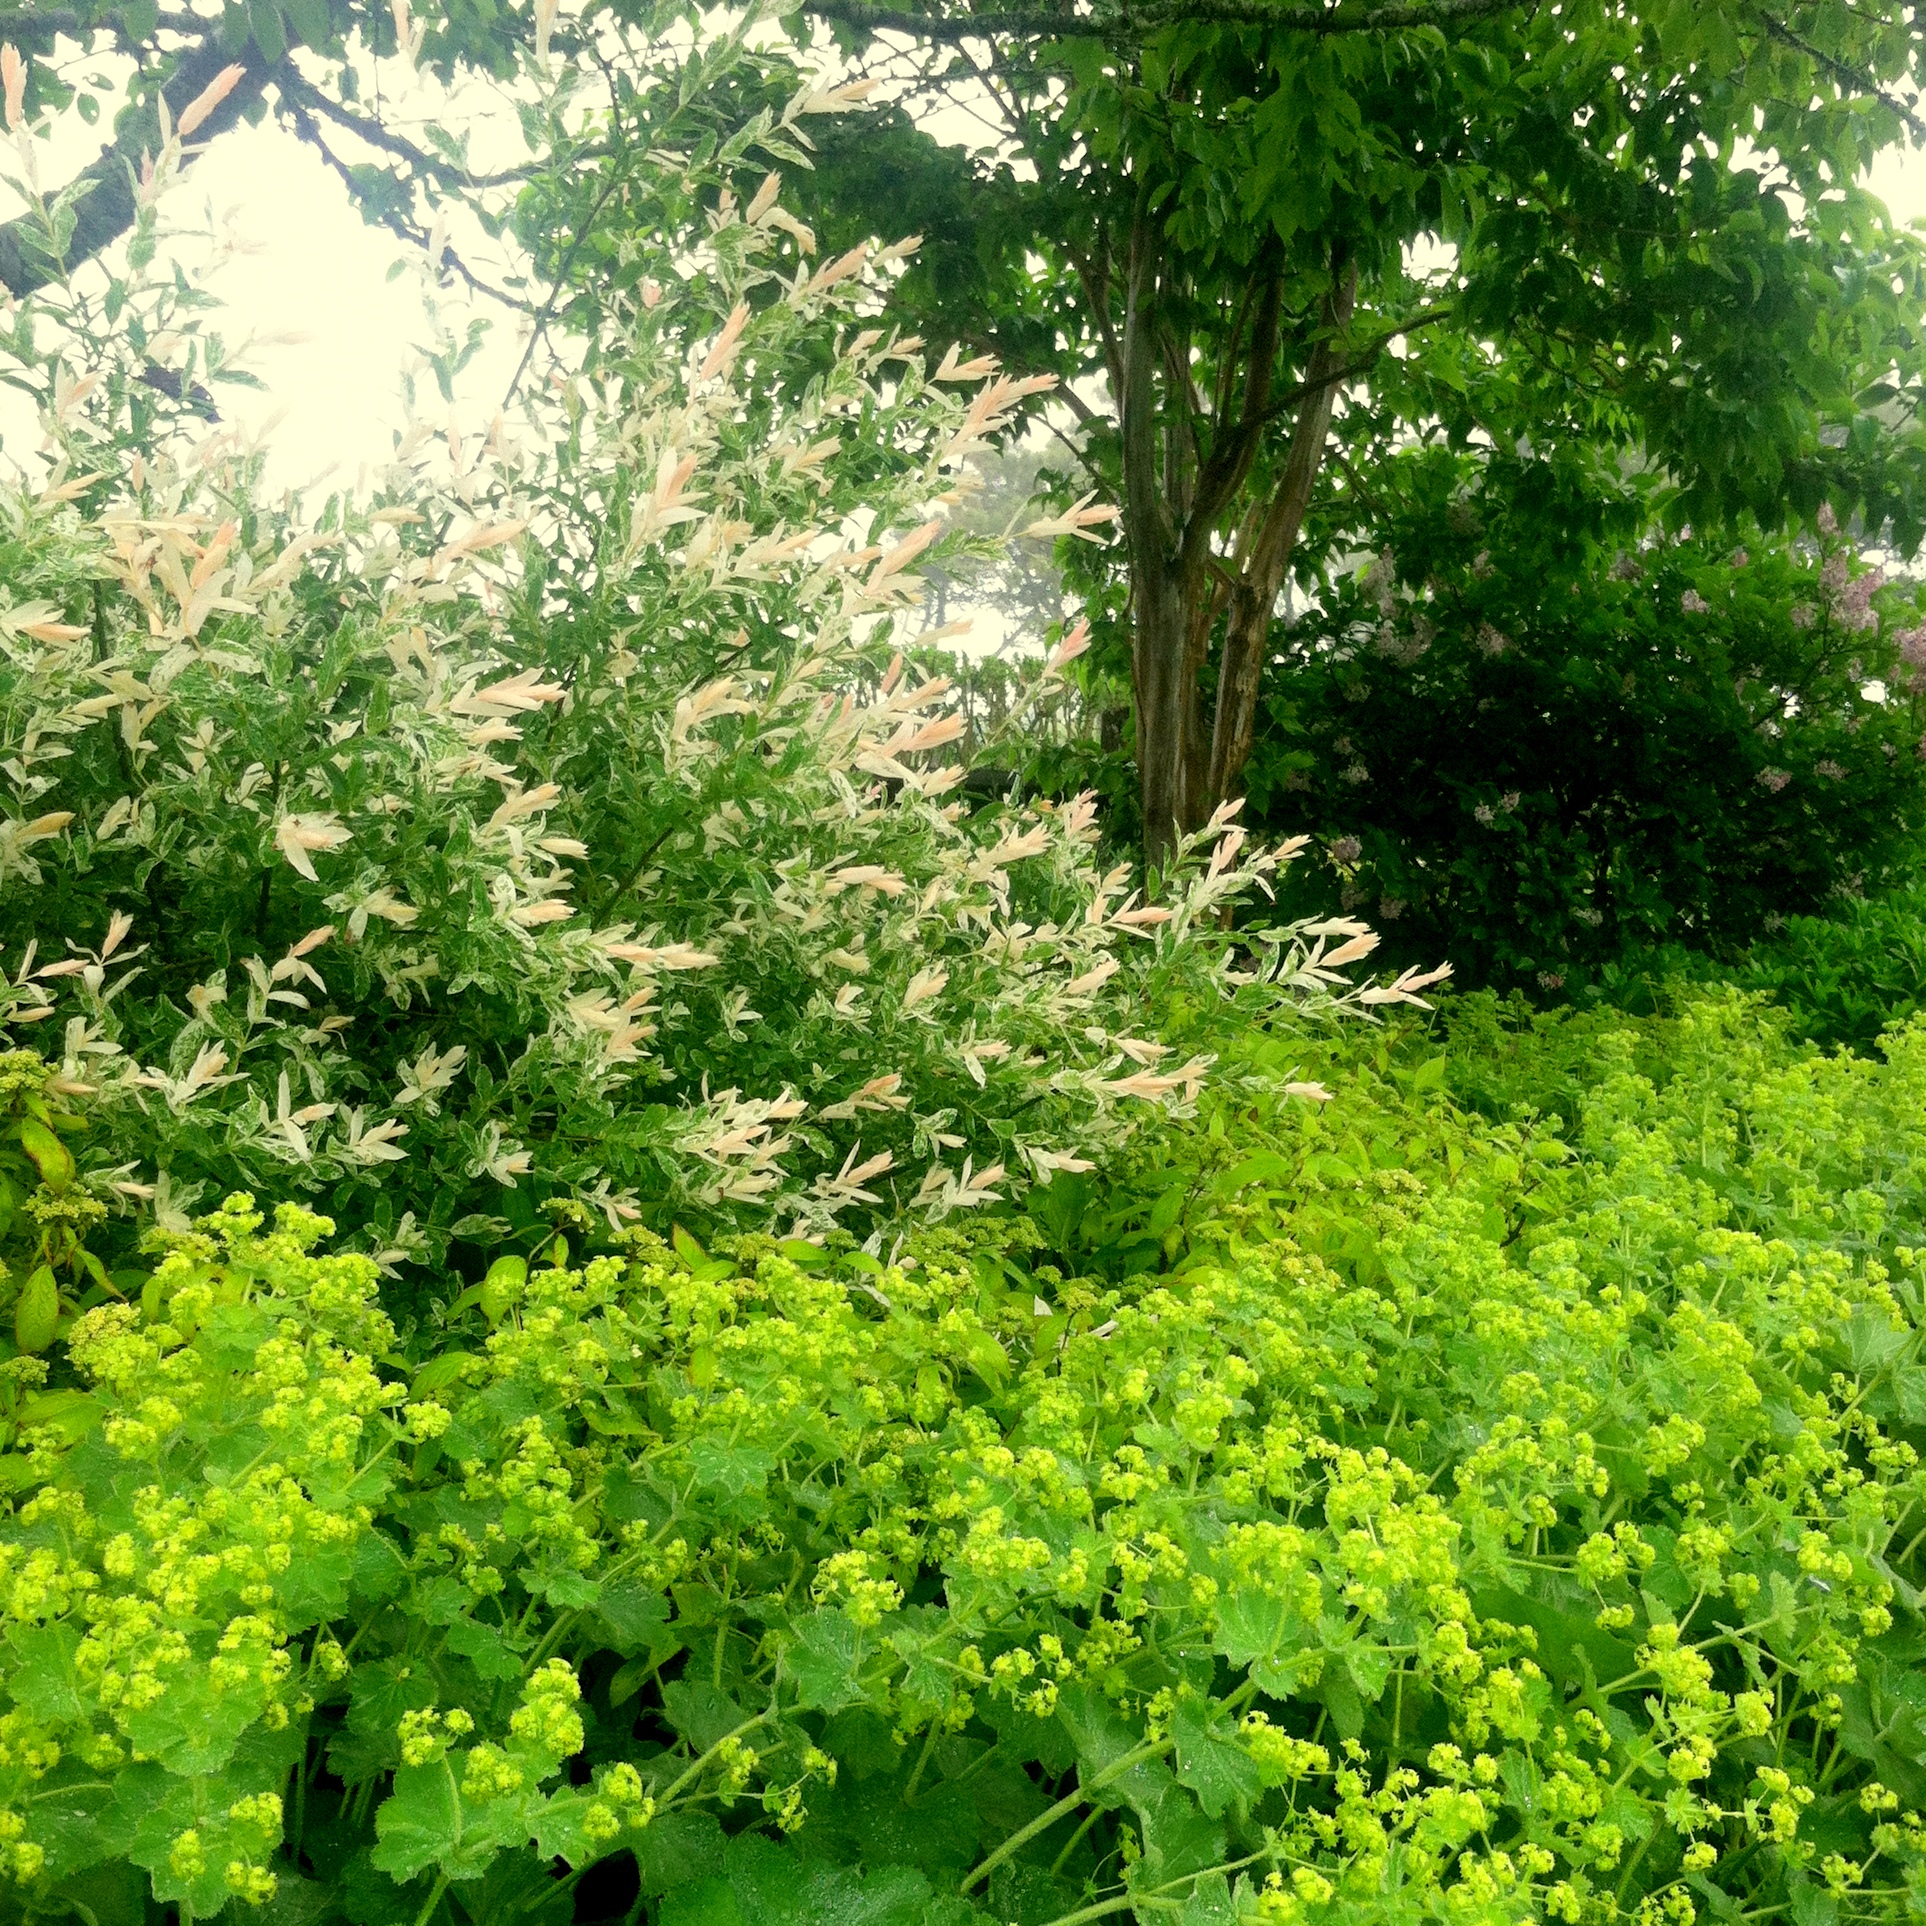
Lady’s Mantle is one of the most common perennials in Nantucket gardens for good reason.  These charming plants are incredibly reliable, rabbit and deer resistant and have loads of flower power over a long period.  They look spectacular in early summer when the plant is covered in chartreuse-yellow flowers.  The tiny star-shaped  airy flowers look just as well in a cut flower arrangement as in the garden.  When not in flower, the fuzzy
foliage is also lovely.  In the morning, the leaves are covered in drops of dew that sparkle in the sun.

These plants blend equally well with sun and shade combinations.   Plant them as a low edging along a shady path with ferns as a background or in the front of the perennial border with catmint or small grasses.  Alchemilla likes a spot with average soil and even moisture.  In my experience, the foliage holds up the best in plantings that have some afternoon shade.

Maintenance is easy.  Once the flowers have begun to turn brown, remove them.  There are a few ways to do it;either shear back the entire plant, allowing the basal foliage to grow and fill back in, or cut or pull the stalks away from the base  of the plant.  While dormant, cut back the foliage to the ground.

Some of the most common species and cultivars are listed below:

  • Alchemilla mollis:  The most common species of Lady’s Mantle.  Leaves are 6″ wide.  Flowers tend to fall toward the outside of the plant when in full bloom, forming a mantle or skirt – hence it’s common name.  18″ tall to 24″ wide.
  • Alchemilla mollis ‘Thriller’:  Slightly larger than the species, possibly with even more flowers. 18-24″ tall and wide.
  • Alchemilla mollis ‘Auslese’ aka ‘Select’ and ‘Robustica’:  A dwarf form.  Compact plants hold flowers in a more upright fashion than other Alchemilla mollis cultivars. 12″ tall and 18″ wide.
  • Alchemilla sericata ‘Gold Strike’:  A compact species, 14″ tall.  Medium-sized, deeply scalloped leaves.  Flowers tend to stay upright.
  • Alchemilla erythropoda:  The smallest species of Alchemilla that is readily available.  Perfect for a tiny garden.  6-8″ tall.

Butterfy Bush

Buddleia davidii 'White Profusion'  - White Profusion Butterfly  Bush
Buddleia davidii ‘White Profusion’ – White Profusion Butterfly Bush

Butterfly-bushes are now in full bloom across the island.  This deer-resistant and drought tolerant plant is a great addition to any Nantucket garden.  First described in 1860’s by French Jesuit, Perre David, this plant now bears his name.  The long, nodding inflorescenses are composed of hundreds of tiny, fragrant flowers that provide nectar for butterflies and other insects.  Many afternoons at the nursery in the summer we are delighted to find our Buddleia alive with Monarch or Swallowtail butterflies.  Plant them in your garden, and you can have the same experience year after year!


Buddleia are very easy to grow.  They require a minimal amount of care and give a maximum amount of pay-off.  In order to keep these large shrubs performing year after year, follow these few pointers:

  1. Plant Buddleia in full sun, with well drained soil.  These plants do not tolerate overly moist soil, and will suffer in damp areas, especially over the winter.
  2. Monitor water during prolonged periods of drought.  Butterfly-bushes are often the first plants to wilt in new plantings when weather is hot and dry
  3. Buddleia bloom on new wood.  Prune back all the previous seasons growth when the plants are dormant.  In windy areas, where plants can be blown out of the ground in winter, consider pruning before Christmas.  Otherwise, grab your loppers in early spring, before growth resumes.  Plants pruned to a foot or so off the ground will generally reach 6-8′ tall during the summer, and reward the gardener with hundreds of blooms.
  4. Deadhead spent flowers as they appear to prolong the bloom period.  Try to make cuts just above a new pair of flowers and you can expect flowering to continue throughout August.

There are many cultivars available with different flower colors.  Some of the most popular are listed below:

  • Adonis Blue tm aka ‘Adokeep’  A Proven Winners selection.  Deep blue flowers. Compact growth habit, 5’tall.
  • ‘Black Knight’  A long-time favorite.  Deep purple flowers.  Very vigorous, 8-10′ tall.  Spent flowers sometimes form small, attractive, shiny purple fruit.
  • Lo and Behold r series.  A Proven Winners selection.  This series has multiple colors in it, Blue Chips tm, being the most available currently.  Very compact habit reaching 3′ tall and wide’
  • ‘Lochinch’  A hybrid Buddleia.  Light lavender flowers.  Very vigorous, 12-15′ tall.  (Though, I’ve not seen any nearly this tall on Nantucket)
  • ‘Nanho Blue’  Mauve-blue flowers.  Compact series, growing 6-8′ tall and wide.
  • ‘Nanho Purple’  Magenta-purple flowers.  One of the smaller Buddleias, reaching only 5′ tall with an arching form.
  • ‘Pink Delight’  Very large bubble-gum pink flowers.  6-8′ tall, rounded-compact form.  Deadheads are unsightly, and are best removed immediately so as  not to detract from fresh flowers.
  • ‘Potters Purple’  Bluish-purple flowers.  Not as fragrant as some others.  6-8′ tall and wide.
  • ‘Royal Red’  Very large deep purple/red flowers.  Vigorous, upright habit reaching 10′ tall.
  • ‘White Profusion’  Very large white flowers. 6-10′ tall, upright habit.  Deadheads appear nearly black, and are extremely unsightly next to clear white flowers, be sure to deadhead.

The Truth about Hollyhocks

Hollyhocks (Alcea rosea) are an old-fashioned staple flower of the cottage garden and a favorite of island gardeners. Stately plants with spires of flowers up to six feet tall grace the back of the border or adorn white picket fences.

Flowers may be single, double, pastel, or saturated, sometimes even bicolor. In perfect growing conditions, they grace the garden for six weeks or more, as flowers open continually up the stalk while the mature ones fade toward the bottom. Because they are biennial plants, during their first growing season they do not flower, rather they form a basal rosette and store energy for the upcoming summer. During the second year, they flower, set seed and die.

Self-seeding is generally sufficient to keep a garden filled with flowers year after year. To be absolutely certain, the nervous gardener will collect seed in September that has ripened on the plant and grow out seedlings right away. Allowing the seedlings to overwinter in a protected area forces the plant into a bloom cycle when growth resumes. Ta Da! Flowers from year to year.

All that said, experienced gardeners already know the DIRTY TRUTH about hollyhocks. Hollyhocks are riddled with disease and insect pests! Rust is Real! Snails are horrible hollyhock eating monsters! If your plants make it to flowering with any leaves at all, INCOMING!!!!! Japanese Beetles cover the plants quickly devouring all that remain! Ok Ok, so you can definitely Sluggo for the slimies, and you can spray insecticide for the avian invaders, but what can you do about rust?


Hollyhock RustHollyhock Rust (Puccinia malvacaerum) is a fungal disease effecting leaves and stems of many plants in the Malva family. Rust is NOT avoidable. Fungal spores are present in the soil, on non-host plants and leaf litter. They are tiny and light enough to be blown hundreds of miles from their point of origin. Once the spore lands on a damp hollyhock leaf, it germinates almost immediately, and infiltrates the leaf’s tissue. As the fungus grows inside the leaf it damages the healthy plant cells, weakening the leaf and disrupting photosynthesis. The rust completes its life cycle quickly and causes orange pustules to erupt on the surface of the leaves. Spores are released from these pustules and infect more plants.


Control measures may be helpful, but will not stop the infection from occurring. Be sure to clean up the garden very well in the fall. Making sure there is no residual hollyhock leaf litter that may harbor spores is a good start. Try applying wetable sulfur early in the season, to create an inhospitable environment for the spores to grow in. Continue to spray the plants as new growth emerges. Allow good spacing between plants to speed drying of the leaves after morning dew. When leaves do become infected, remove them. Most importantly, plant tall, late season perennials in front of your hollyhocks to mask their foliage. Phlox works well, as do Montauk daisies.


Climbing Roses

One of the most romanticized images of Nantucket is the “‘Sconset Rose-Covered Cottage”. The most prevalent rose in Siasconset is ‘American Pillar’. Introduced in 1902 by Van Fleet, it’s stunning when in full bloom, covered in sprays of carmine flowers with white centers. Of course, there are many other climbers available to us in a variety of flower forms and colors. Following is a list of climbing roses that are readily available and their characteristics.

Rose Collage


Rosa ‘New Dawn’

Clusters of Pink buds, opening to large, light pink double blossoms that fade to nearly white. Blooms on new and old wood.  Glossy dark green leaves.  Lightly scented.  Introduced in 1930.  Climbs to 20’ tall.   Good disease resistance.

Rosa ‘Eden’ aka ‘Pierre De Ronsard’

Large rounded, fully double, flowers open with a deep carmine center fading to white at the edge of the blossom.  Free-flowering.  Glossy dark green leaves.  Lightly scented.  Introduced in 1987.  Slowly climbs to 12’ tall.  Good disease resistance.  Shade tolerant.

Rosa ‘Climbing Iceberg’

Clear white, double blooms appear in clusters on old wood only.  Mild sweet rose scent.  Introduced in 1968.  Climbs to 14’ tall. 

Rosa ‘Zepherine Drouhin’

Pink, frilly, double blossoms with a white eye.  Strong bourbon rose scent.  Re-blooming.  Practically thornless.  Introduced in 1868.  Climbs to 8 to 10’ tall.  Shade tolerant.

Rosa ‘Sally Holmes’

Buff-colored buds open to large, single white flowers.  Color is distinctively pink in cooler temperatures.    Slight fragrance.  Blooms on new wood.  Free-flowering.  Introduced in 1976.  Climbs to 6 to 12’. 

Rosa ‘American Pillar’

Clusters of pink, single blossoms have a white eye.  Lightly scented.  Blooms only in early summer.  Deep glossy green leaves.  Vigorous rambling habit.  Introduced in 1902.  Climbs to 20’ tall.  Prone to powdery mildew early in the season.

Rosa ‘Blaze Improved’

Clusters of pure red, double flowers.  Lightly scented.  Blooms on new and old wood.  Introduced in 1932.  Climbs to 14’ tall. 

Rosa ‘Golden Showers’

Abundant clusters of single, yellow flowers with frilly petals.  Sweet licorice fragrance.  Blooms on new and old wood.  Introduced in 1956.  Climbs to 14’ tall. 


Dividing Ornamental Grasses

Now that the worst of wintry weather is over, and the soil is workable, the number of garden chores is stacking up quickly. One of the chores that tends to get left off the list year after year is dividing ornamental grasses. Maiden grass (Miscanthus sinensis), in particular, tends to outgrow its space and die out in the center. This can also be an issue for larger fountain grasses (Pennisetum).


The general rule of thumb is to dig and divide these plants every 3-5 years. Although it’s a lot of work, dividing has a lot of benefits:

Miscanthus sin. 'Strictus' -1
Miscanthus sinensis ‘Strictus’

•It reinvigorates tired plants, allowing them to last for many more years in the garden.

•It keeps the overall size of the clump in check.

•It provides the gardener with free plants to use in the garden or give away to friends

•Divisions are guaranteed to be the same cultivar as the original plants. This can be very helpful to gardeners that don’t know the exact variety they have in the garden, but want to make a perfect match.


Once you “decide to divide”, do yourself a favor and enlist a friend. Large clumps have extensive, deep root systems that are extremely heavy, the more help the better. Before you begin, prepare the work area by laying down a tarp next to the plant and gathering your tools. Hedge trimmers, a heavy steel spade, sharp axe, wheel barrow, and a good pruning saw could all help the job along. I tend to use the spade to do all the digging and dividing, but a selection of tools is best. I’ve heard a reciprocating saw with a 12″ blade can be very handy to make the divisions once the clump has been liberated from the ground.

1)  Cut back the desiccated foliage. Have your friend either tie the blades into a bundle or hold them together in his arms. Using the hedge trimmer, cut the foliage off between 6 and 12″ from the ground and discard it.

2)  Dig the clump out of the ground. Dig around the plant, about a foot from the edge of the clump. The first time around, just focus on making a good track to work from. Continue to dig progressively deeper and under the clump, until it can be “popped” free from the soil, using the spade as leverage. If you have trouble pulling the clump out, try rocking it back and forth while your partner slides a tarp under it. Then pull it out of the hole on the tarp. Alternatively, cut the clump into smaller, lighter sections right in the ground and then pull them out.

3)  Make the divisions. With a sharp spade, saw or axe split the clump in half. Continue to cut it up into more or less equal sections that can be replanted. Keep in mind, the ideal division will be from the outside of the clump and at least as big as palm of your hand. Don’t make divisions from the weak, woody center of the clump. This is the oldest part of the plant and will not transplant well.

4)  Don’t allow the roots to dry out as you work. Although grasses are very tough, like any plants, they don’t like to have their roots dry out. Keep the bare roots covered as much as possible, and if they start to get dry, give them a light sprinkle with the hose.

5)  Replant one division to replace the original plant. Grasses prefer lean soil that is not high in organic matter. Do not amend the backfill or add fertilizer. Just place the division in the hole and plant with the native soil. Gently press the soil against the roots as you back-fill to be sure the roots have good contact with the soil and that there are no air pockets.

6)  Water the new plant well. Make a berm around the plant with soil. Fill the berm with water and let it drain, then fill it one more time. As the plant roots and new top-growth appears, it will still need regular water. Once the plant is established, flatten out the berm and mulch around the base.

7)  Pot up what you can’t plant right away. Ornamental grasses are a great gift for your fellow gardener, why not pass a few along? * Never feel guilty for discarding extra plants if you have no use for them. They are better in the compost than an annoyance to water or jammed into places in the garden they shouldn’t be.


Elms


Rico with Ulmus parvifolia 'Allee'A favorite of early settlers, the American elm has fallen out of favor in recent decades. Since the onslaught of Dutch elm disease and the demise of thousands upon thousands of trees across America and Canada, many are afraid to plant them today. I’m happy to inform our customers that the island is actually a great place to grow elms! Nantucket is one of the few towns in America that still boasts hundreds of healthy elms planted and thriving along its streets.

Be assured that there are many varieties available that are resistant to Dutch Elm Disease and other insect and diseases.  Some of these are cultivars of Ulmus americana, our native elm tree.  But there are other species as well, like Ulmus parvifolia, Chinese or lacebark elm, and many hybrids.

American, hybrid and Asian elms are generally fast-growing, adaptable trees that are tolerant of poor soil, drought and even salt spray.  The species we sell are mostly large trees with ovate (oval-shaped) dentate (serrated) green leaves of varying sizes.  They make wonderful shade trees in the residential landscape as well as excellent street and park trees in towns and cities.

In 2005 the National Elm Trial was planted with a large variety of test plots across the country.  The results of this ten year evaluation can be found  on the Colorado State University’s website.  The results from the Vermont test plot can be found here:  https://bspm.agsci.colostate.edu/files/2013/03/Vermont-Elm-Trial-March-1-2016.pdf

Some of the best that we carry are listed below:

Ulmus americana ‘New Harmony’:  Introduced by the US National Arboretum.  Upright-arching, vase shaped canopy.  Similar to ‘Valley Forge’, but possibly with a more upright habit, requiring less training.  This cultivar also outperformed ‘Valley Forge’ in the National Elm Trial test plot in Vermont.  Resistant to Dutch elm disease.  Grows 70′ tall.

Ulmus americana ‘Princeton’: Described as an excellent vase-shaped form by Dirr.  Very fast growing, with large, deep green leathery leaves.  ‘Princeton’ did well in the National Elm Trial test plot in Vermont, and is a recommended variety.  This tree is likely to grow sixty or more feet tall.

Ulmus americana ‘Valley Forge‘: Introduced by the US National Arboretum.  Upright-arching, vase shape with a full canopy. Perhaps a little more rangy than ‘Princeton’.  Very resistant to Dutch elm disease.  These trees will likely reach 60-70 feet.

Ulmus Accolade(r) aka ‘Morton‘: A hybrid elm, with deep green foliage. American elm-like shape.  Accolade (r) did well in the National Elm Trial test plot in Vermont, is a recommended variety.  Grows 50-60 feet tall, with a spread of up to 40 feet.

Ulmus Allee(r): A hybrid, this variety looks a lot like Chinese elm, with the overall shape of American elms. The canopy is wider, somewhat less vase-shaped than American elms.  Mature trees are easily identifiable by the orangey colored lenticels that form on the furrowed bark. The green glossy leaves are smaller than American elms. Very resistant to Dutch elm disease.  This tree will likely reach 60-70 feet tall in ideal conditions

Ulmus ‘Patriot’ aka ‘Prospector’:  Released in 1993, this elm is a modern hybrid of American and Chinese elm species with excellent resistance to Dutch elm disease and elm leaf beetle.  It has a moderately vase-shaped canopy.  ‘Prospector’ did well in the National Elm Trial test plot in Vermont, and is a recommended variety.  The deep green, glossy leaves are 4″ long and 3″ wide, changing to yellow in fall.  These trees are expected to grow to 50 feet tall.

Ulmus parvifolia ‘Dynasty’:  This Chinese elm was bred at the US National Arboretum from seeds that were brought to America from the Forest Experiment Station in Keijo, Japan in the early part of the last century.  The canopy of this elm is more rounded than American elms, with the fine foliage characteristic of their Chinese cousins.  These trees are expected to grow to 50 feet tall and nearly as broad.


Okame Cherry

Prunus 'Okame' flowers-1


Those of us living on the island year-round have the opportunity to enjoy spring-flowering trees. One of the nicest of these, is the Okame Cherry. Prunus ‘Okame’ is the first cherry tree to bloom in the spring on Nantucket.

Its carmine flowers cover the branches in late March or early April, appearing before leaves unfurl. The habit is described as broad-columnar with a height between 20-30 feet.  Okame cherries are available in both a standard tree form and a multi-stem form.  These trees are very adaptable, but prefer full sun and good soil. They grow very quickly and will reach their mature height by 15 years of age.

We have 3 large multi-stem specimens in stock right now that would make an amazing show in a larger landscape.  We also have a beautiful group of standard trees available.  If you like cherry trees and are considering planting one, now is a great time to stop by the nursery to see what ‘Okame’ looks like in person!


How to Prune Mop Head Hydrangeas

Hydrangea macrophylla 'Blue Cassel' - Blue Cassel Big Leaf Lacecap Hydrangea

There are a lot of things that define what kind of gardener a person is.  Some of us are spring clean-up people, some are fall clean up people; some like to prune woodies in fall, some in spring. If you are a spring pruner, it’s the perfect time to get out your pruners and go to work! One of the plants often pruned this time of year is Hydrangea macrophylla.


When Pruning Hydrangeas keep your objectives in mind:

  • Removal of spent flowers from the previous season.
  • Removal of dead wood.
  • Thinning out the shrub by removing:  Stems that are older than three years; Large complex branches; Branches that cross the center and tend to rub on more desirable stems; Stems that run horizontally along the ground and root, increasing the overall size of the plant.
  • Shaping the shrub into a natural-looking, balanced, spherical shape.


Follow these steps:

  1. Take a moment to look at the over-all shape and size of the plant. Is it too large for it’s space? Hydrangeas in foundation plantings tend to “eat the lawn” over time. Consider widening the bed to accommodate the mature size of the plants, instead of pruning the plant back to an unnatural-looking shape. * ‘Nikko Blue’ Hydrangeas, in particular, tend to get very tall and wide – covering windows and brushing against shingles on the side of the house. There is no way to keep a ‘Nikko Blue’ Hydrangea blooming each year and shorter than 4 feet, if you are battling huge plants, consider replacing them with a smaller variety.
  2. Remove all spent flowers from the tips of the stems. All pruning cuts should be made just above a healthy set of buds. There is no need to “tip branches” if there are no faded flowers to remove. Buds overwintering in the top portion of the plant have the potential to flower.  If too much material is removed, the plant may not flower at all.
  3. Remove all dead and damaged stems. It is preferable to completely remove dead stems at ground level where possible.
  4. Remove about a third of the overall bulk of the stems, following the guidelines above. This helps increase sun and air circulation in the center of the plant, initiating flower bud formation and strong new growth from the base.
  5. If you must, cut back no more than a few feet from the top of the shrub, to get it below a window or railing.  Keep in mind, the plant will quickly grow back to it’s natural size by the middle of the summer.
  6. Step back, and take a look at your work. Make final cuts, leaving a rounded, balanced shrub.

Alternaria Leaf Spot on Privet


Ligustrum ovalifolium 'Privet'Every year there seems to be another emerging threat to our plants that is fungal in nature. Nantucket’s intrepid gardeners are all used to fighting with black spot on roses and powdery mildew on border phlox, but there are many other spores and spots floating around out there that effect other species. One the up-and-comers is an infection that effects privet: Alternaria Leaf Spot.

This fungus causes ugly necrotic spots on the leaves, followed by yellowing and leaf drop. Severely effected plants can have substantial defoliation by the end of the growing season. Like many fungal diseases, symptoms usually first appear inside the plant where air circulation is low. This often makes early detection a problem, so treatment is delayed.

As far as we know, this fungus is more of a problem in production nurseries where thousands of privet plants are grown close together, providing a constant supply of inoculum for reinfection. Although we have seen spots similar to these on privet on Nantucket in the past, our customers didn’t report any widespread issues with this fungus last summer.

For more information on Alternaria Leaf Spot, check out this link to Cornell extension: http://ccesuffolk.org/assets/galleries/Agriculture/Commercial-Nursery-and-Landscape-Management/Alternaria-leaf-spot-on-privet-fact-sheet-revised-4-11.pdf

We source our privet from reputable growers and haven’t found alternaria leaf spot to have been a problem with our suppliers in the past. However, we do inspect each shipment as it arrives and will continue to make selling the highest quality plants our goal.


Much Ado about Mulching

January can be a tough month for year-round gardeners on Nantucket. With a mailbox filled with garden supply and seed catalogues, it can be nearly impossible to stay inside on those random “almost warm” days. Maybe you want to get some of the hard spring clean-up work done early? Thinking about easing off some of those holiday lbs?

If a few warm, dry days are forcast, why not do your mulching? The plants certainly don’t care if you get it out of the way. Trees, shrubs and perennials all benefit from a nice layer of mulch to keep soil temperatures regulated during winter freeze and thaw cycles.

Don’t forget, plants that are suited to growing in the North East naturally create their own mulch. Fallen leaves, needles, ground cover plants and spent growth from previous growing seasons carpet the ground in natural forests and meadows all winter. We tend to tamper with this natural system. A combination of leaf and pine needle cleanup, and high winter wind can really thin down the mulch layer on top of the soil, especially if you are the kind of gardener that likes to keep your beds super-clean. If you do want to do some mulching, here are some tips:

SITE PREP:

It’s best to work in the garden when the soil is on the dry side to avoid compaction. If we have a wet spell, stay out the garden all together.

If you have mulch delivered, or you like to work from a pile in a centralized location, consider layering two tarps on top of each other before dropping the mulch off the truck. Preventing mulch from migrating onto your lawn, or into the gravel or shell in the driveway is the best way to avoid an annoying clean-up after a long day.

Be sure to pull any weeds you find growing before you begin. Some gardeners have the idea that mulch “smothers” weeds. But I guarantee you, mulch spread at the proper depth will not irradicate grass, dandilions, or any other perennial weeds.

If you use organic fertilizer, feel free to apply it before the mulch goes down. Organic fertilizers can be used any time of year, because their nutrients are only available to plants when soil organisms can break them down for plants to use. When temperatures rise in spring, and soil organisms become active, the fertilizer is in place, ready for them to break down and give to your plants.

THE REAL HOW TO:

If you are lucky enough to work off of the back of a dump truck, do so. Whenver the mulch gets too far out of reach, put up the tailgate and raise the bed. The much effortlessly slides back into reach.

Work with a partner! Mulching is hard work – split it up by having one person bring and pile mulch into the beds and another spread the piles into an even 3 inch deep layer.

It can be tough to manoever a wheel barrow in tightly planted beds. Use a bucket to scoop mulch from the wheel barrow and dump it in piles throughout the beds

Small piles of mulch are much easier to spread than large ones. If your partner runs out of mulch in a particular spot you can bring him another bucket-full on the next trip.

Mulch is most easily scooped with a light pitchfork with three or four tines.

If you are working with a few friends, and you want to avoid a lull in work, let everyone make piles, then go to pick up more mulch. Your helpers can spread what is on the ground while you go to get the next load.

AVOID COMMON MISTAKES:

Never let mulch touch the crown of plants. One of the benefits of mulch is that it holds moisture. But this moisture next to the crown of plants can cause more harm than good. This is especially true with trees and shrubs. Leave a space of a few inches around the trunks of trees and the base of shrubs. This will ensure mulch doesn’t rot the bark close to the soil, or make a home for insects like turpentine beetles.

Mulch is at its best when it is spread 3 inches deep; much less and it’s not effective, much more and it is just a waste. Not to mention that thick layers of mulch can build up over time causing numerous problems. Try to be aware of the thickness of the mulch before you start and as you are working. If your garden still has a thin layer of mulch from last year, you may only need to add another inch or two.

Don’t let mulch pile up next to hardwood shingles on your house or outbuildings. The mulch will quickly rot out the lower shingles, forcing you to replace them sooner than you would otherwise.